 |
|
|
The
Marion-Seiber Route Compiled from hikes in 2014, 2015 & 2016 by Dennis Foster |
|
|
|
|
|
|
|
The
Marion-Seiber Route Compiled from hikes in 2014, 2015 & 2016 by Dennis Foster |
|
|
|
|
|
In October of 2014 I had the chance to experience the Marion-Seiber route in Nankoweap. It had been popularized by Doug Nering in recent years, and he likes to refer to this as the "Freefall" route. While he described this route from the top down, I rewrote his (and others) notes for me to go up, as I felt that this would be easier (if there is such a thing!). I returned to Nankoweap in October of 2015 and November of 2016 and both times I came up this route. I have tried to take photos to show various parts of this route, but it is often difficult to get things into perspective. And, instead of describing this route from the bottom up, I'll follow Doug's lead and show it the other way ... |
|
|
|
|
Click on any picture to see a larger image. |
|
|
|
|
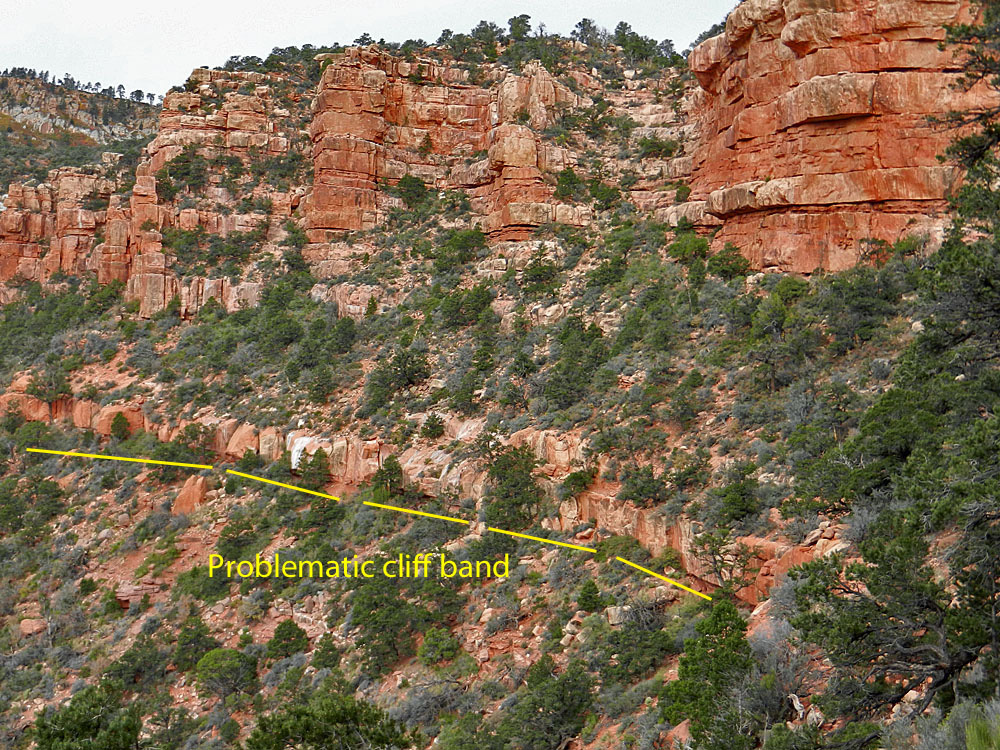 |
The general lay of the land near the top of the route. From the bottom of the switchbacks off the saddle, contour to the right (west) until you can pass the major cliff band in the Supai. |
 |
If you come down too soon, or come up too late, this cliff band will present some problems. |
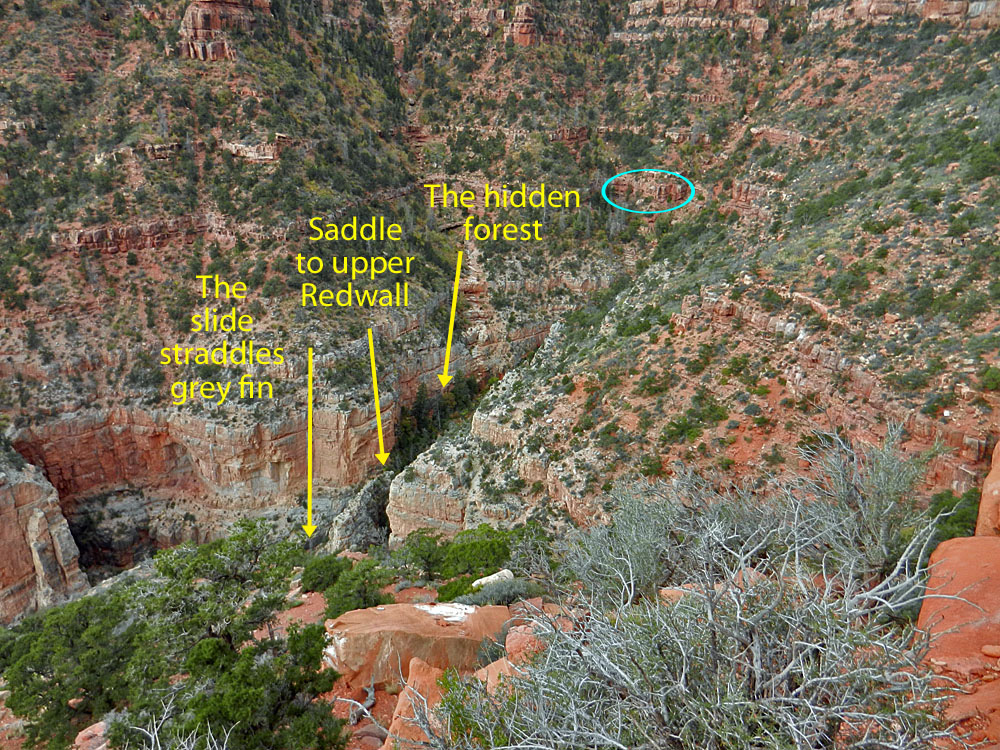 |
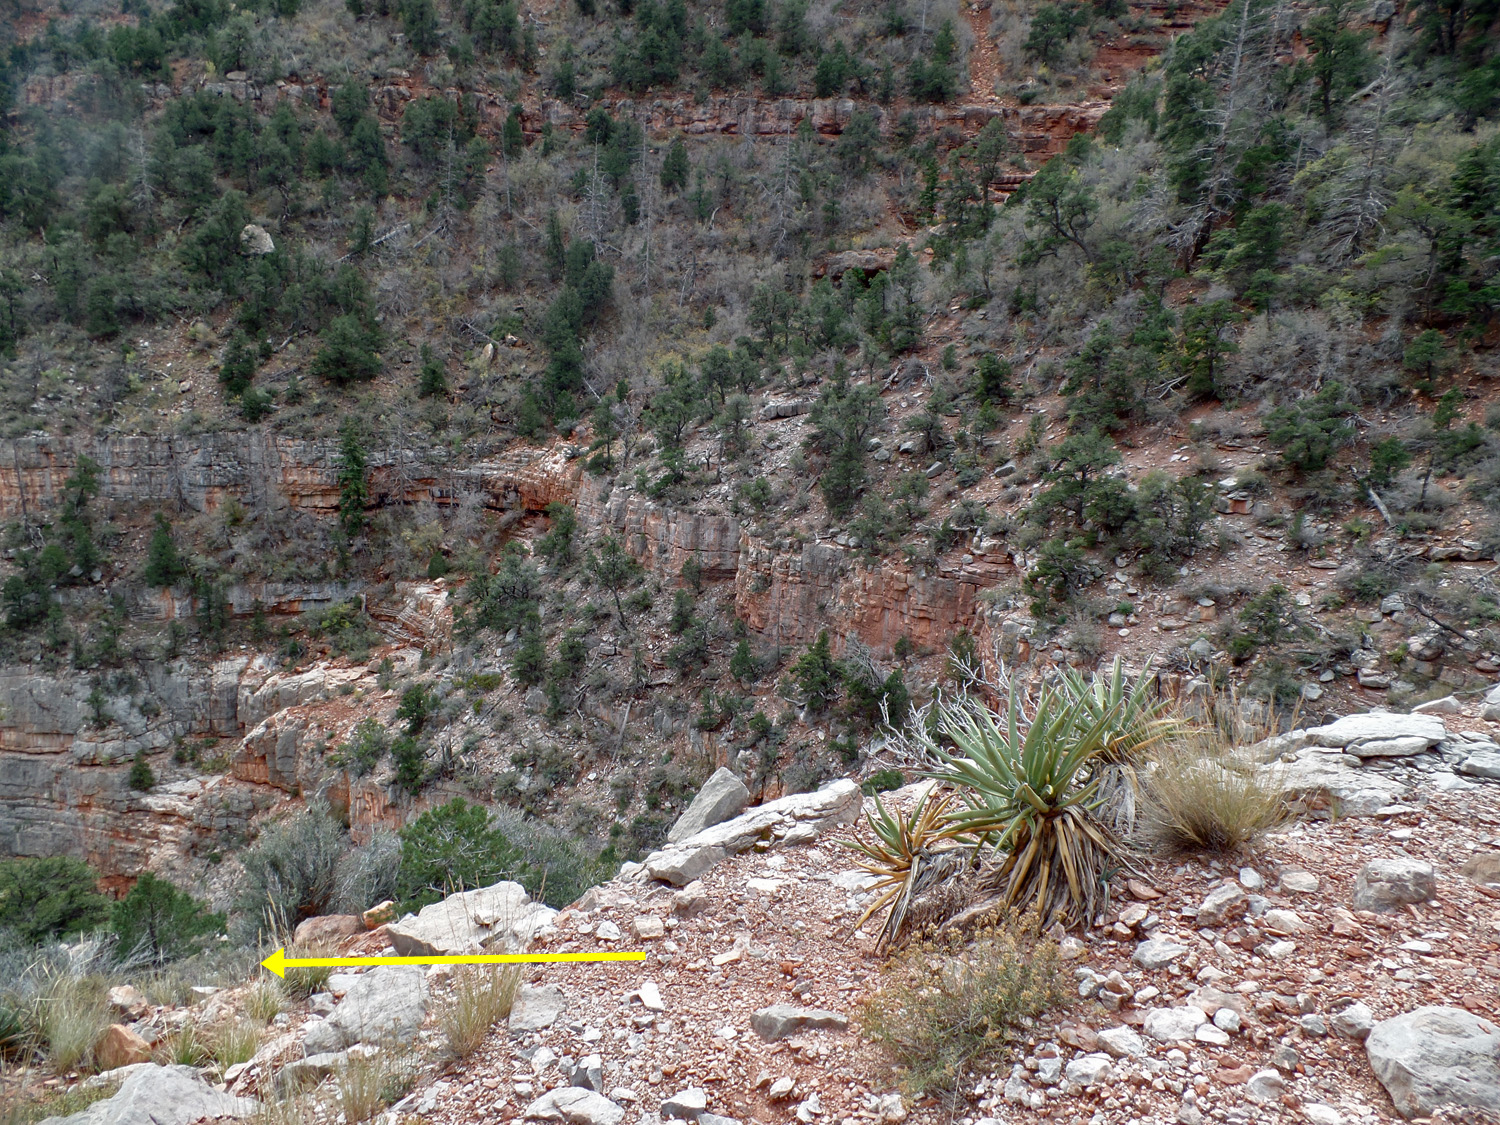
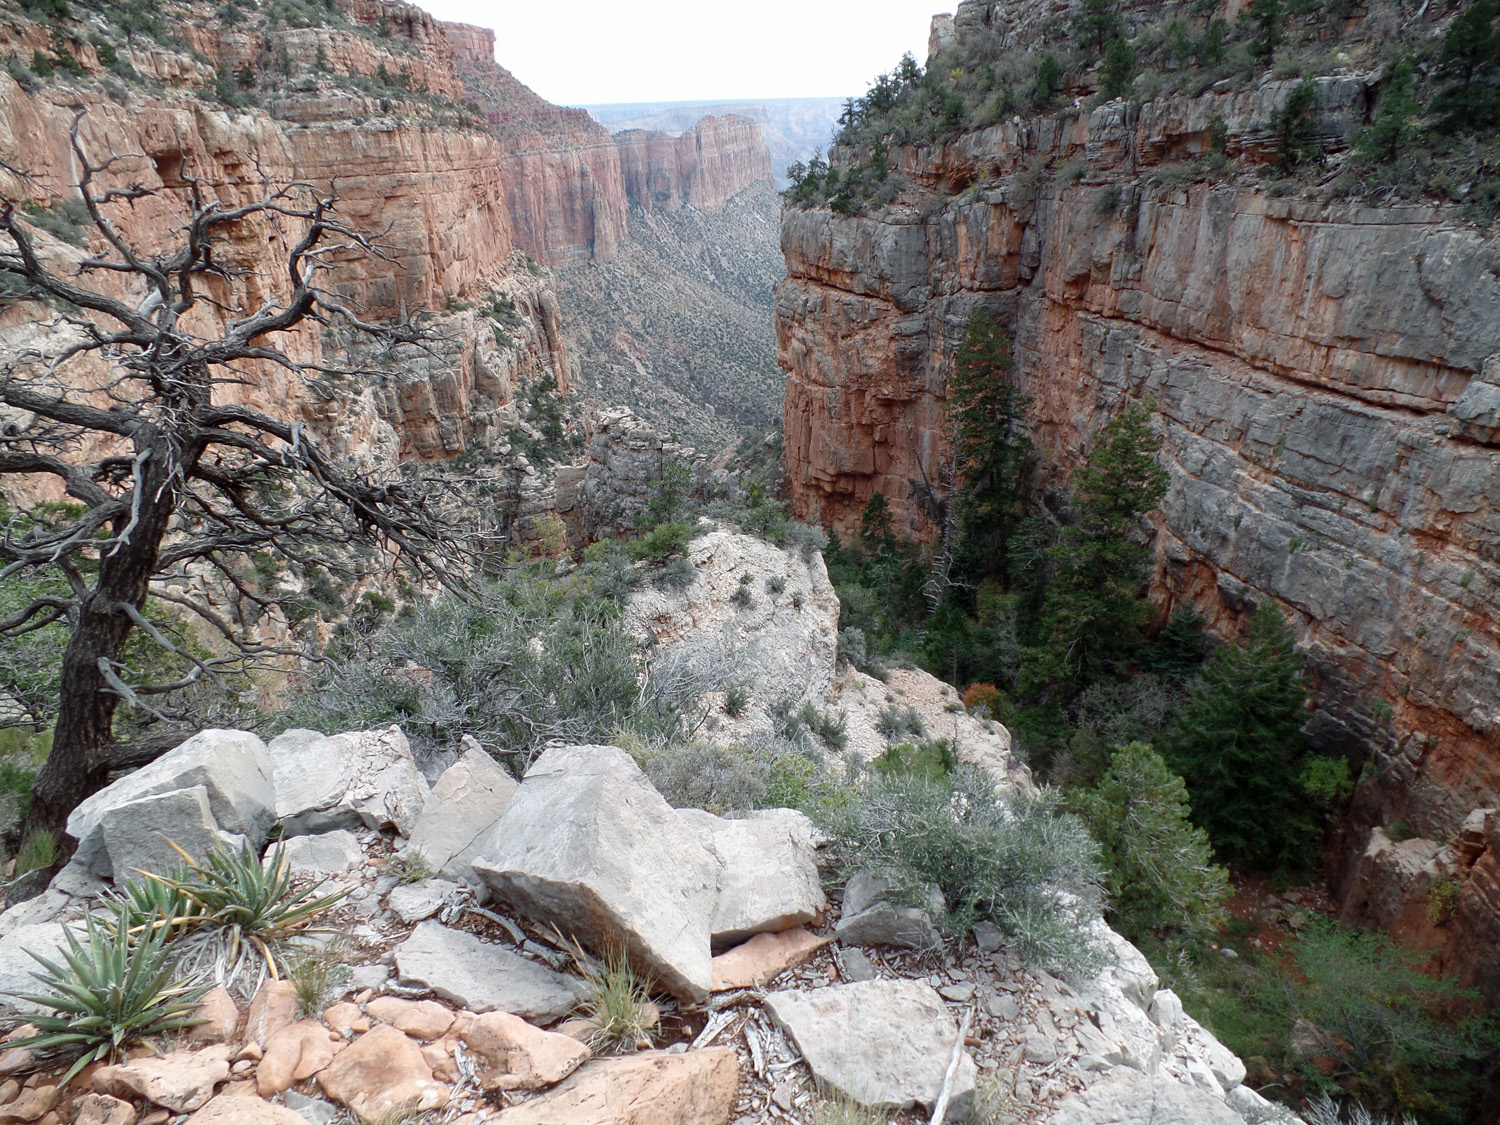
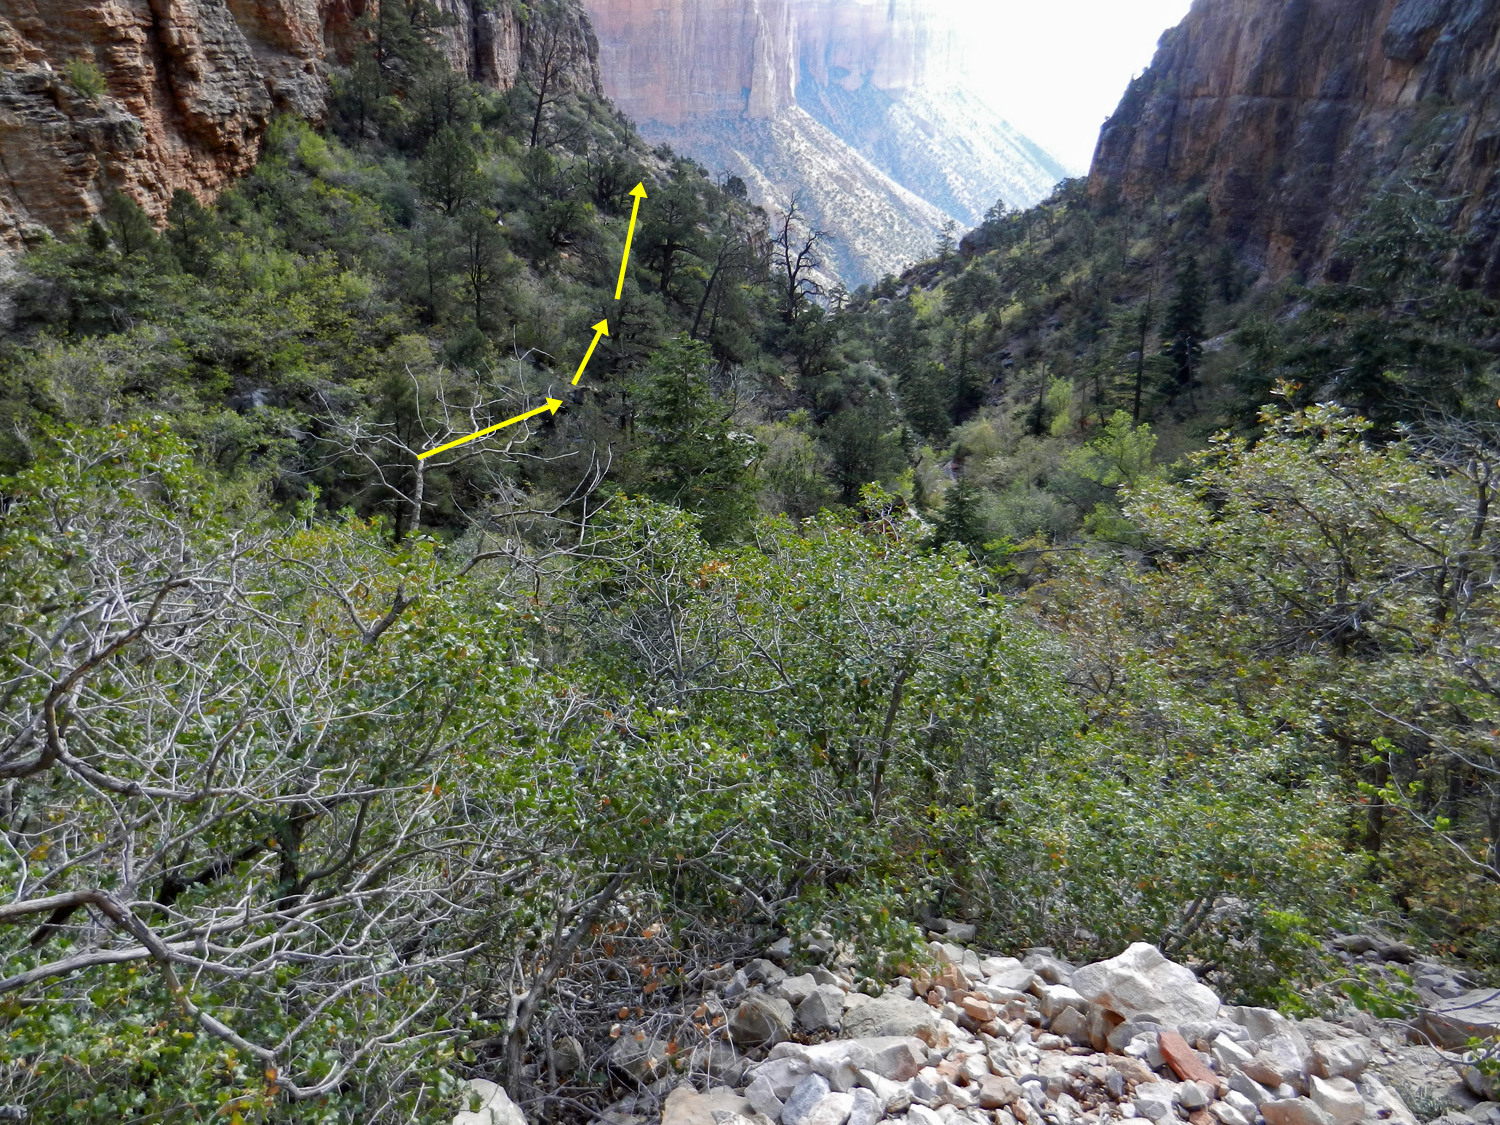
As the view opens up down into the Redwall you can see the hanging forest, the saddle that leads to the very steep descent and the grey fin that forms the left (east) edge of this descent. The takeoff from the rim of the Redwall isn't quite at the very head of the canyon, although it looks like it from here. The blue circled area appears in a later photo showing one of the breaks through a cliff. |
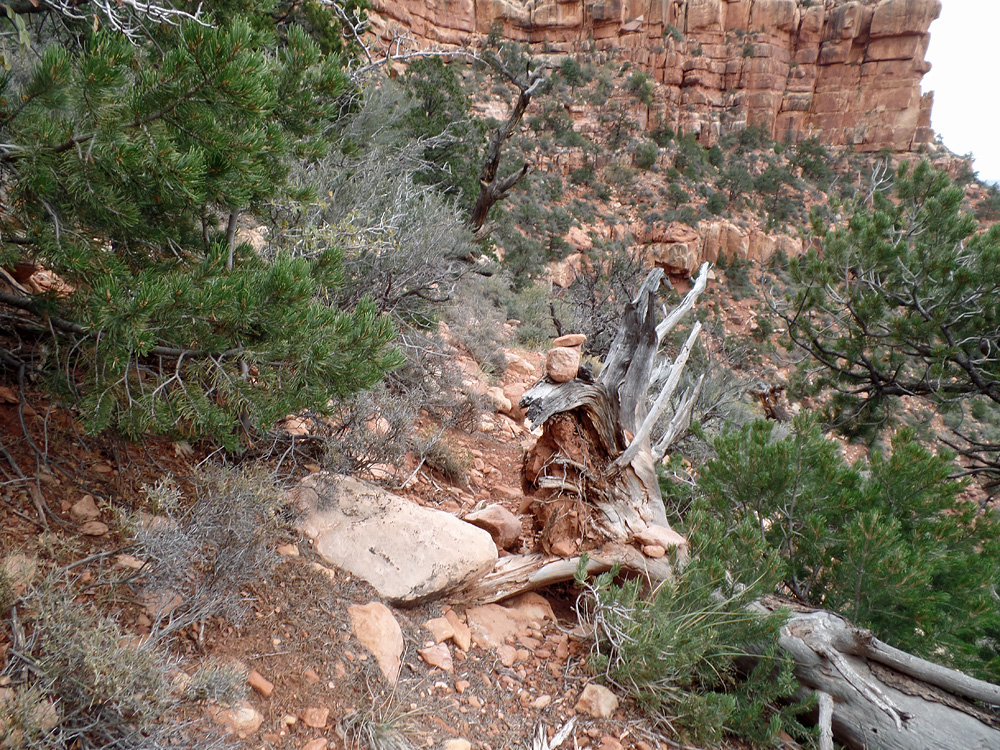 |
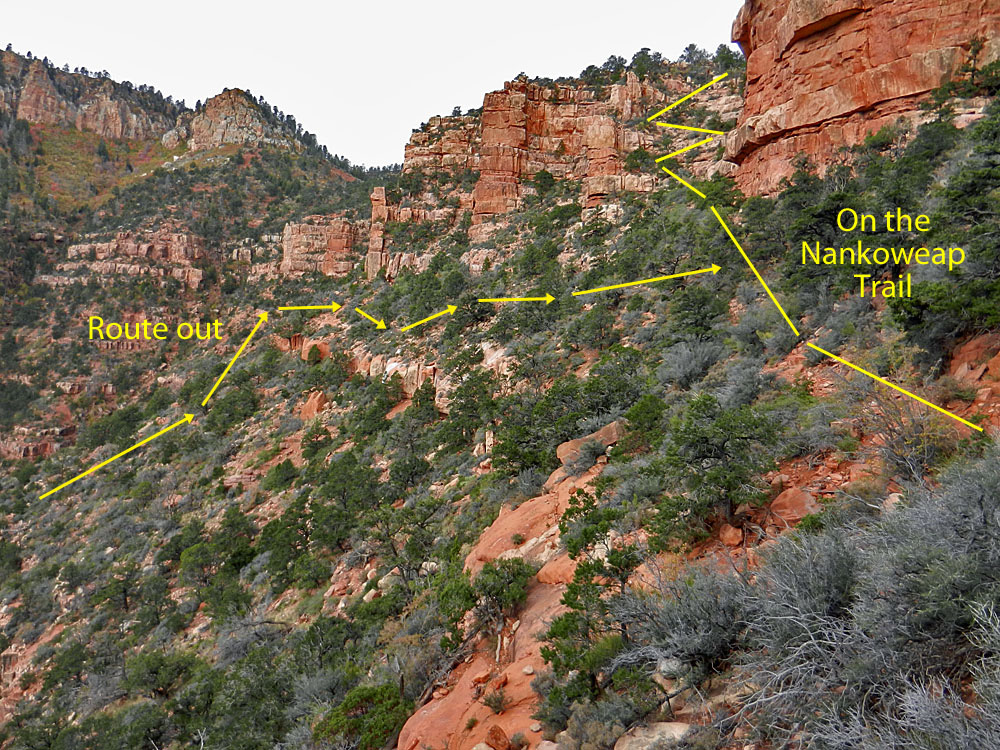
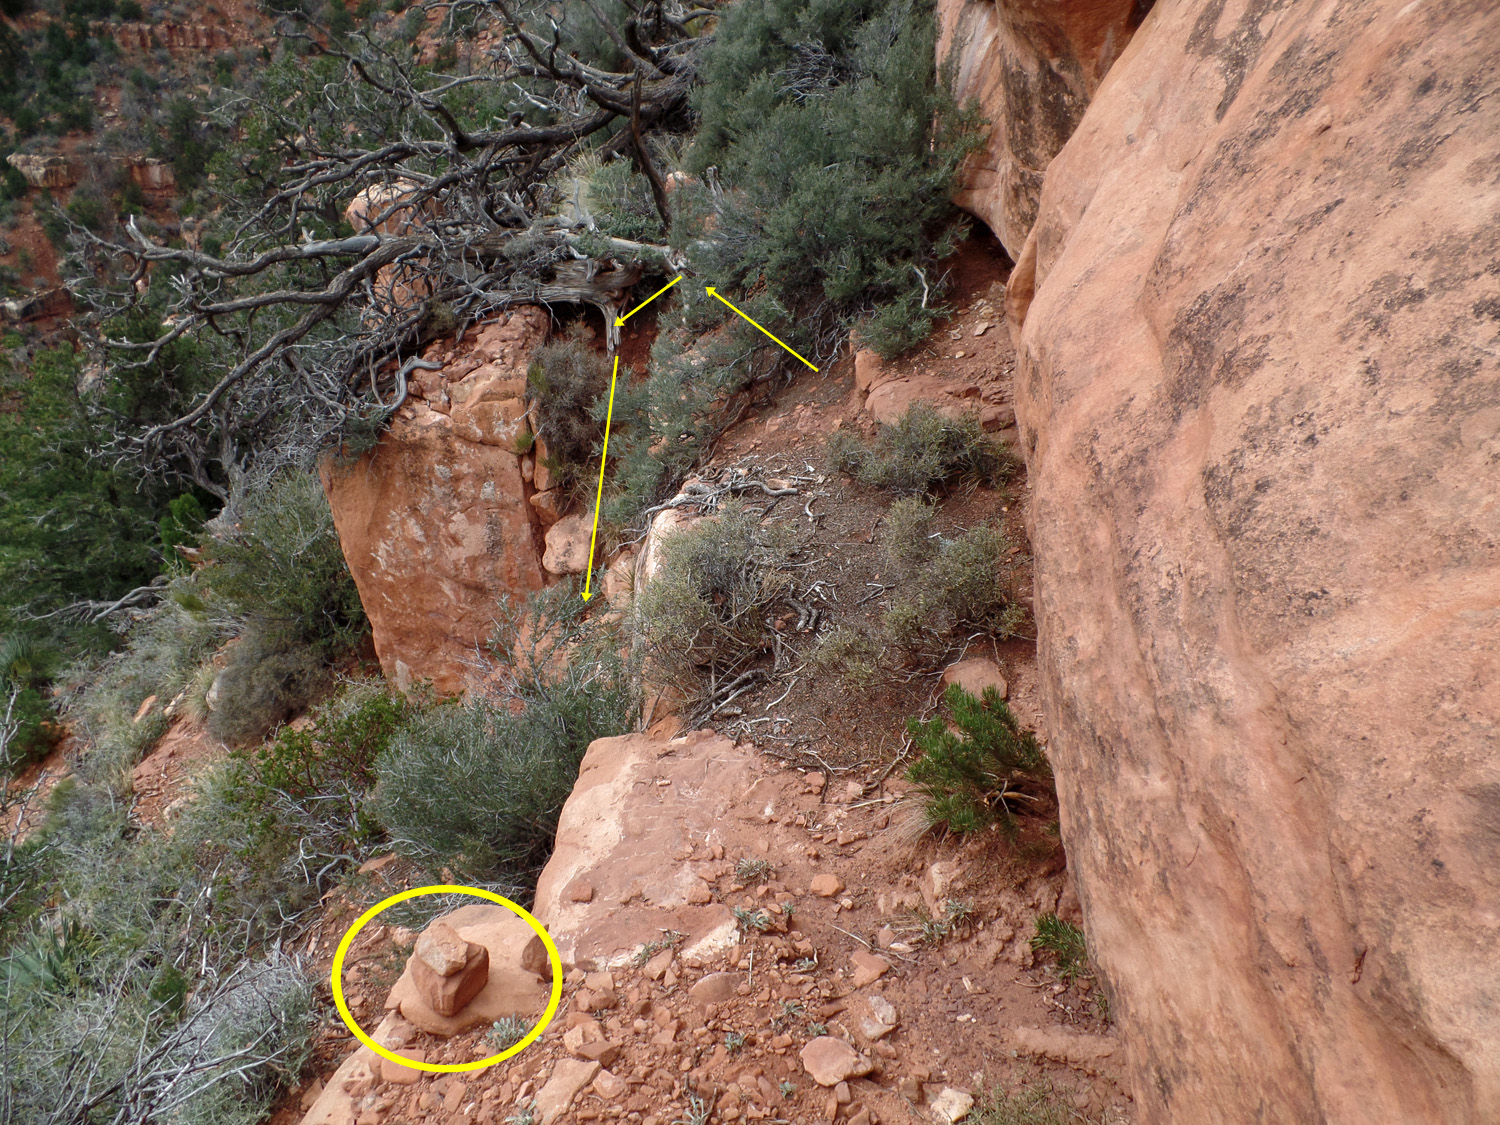
Shortly after leaving the Nankoweap Trail you may pass by this fallen tree with a cairn on top of it. The route along here is generally brushy and it seems best to stay just above the cliff band. [View is looking towards the east; i.e. towards the Nankoweap Trail.] |
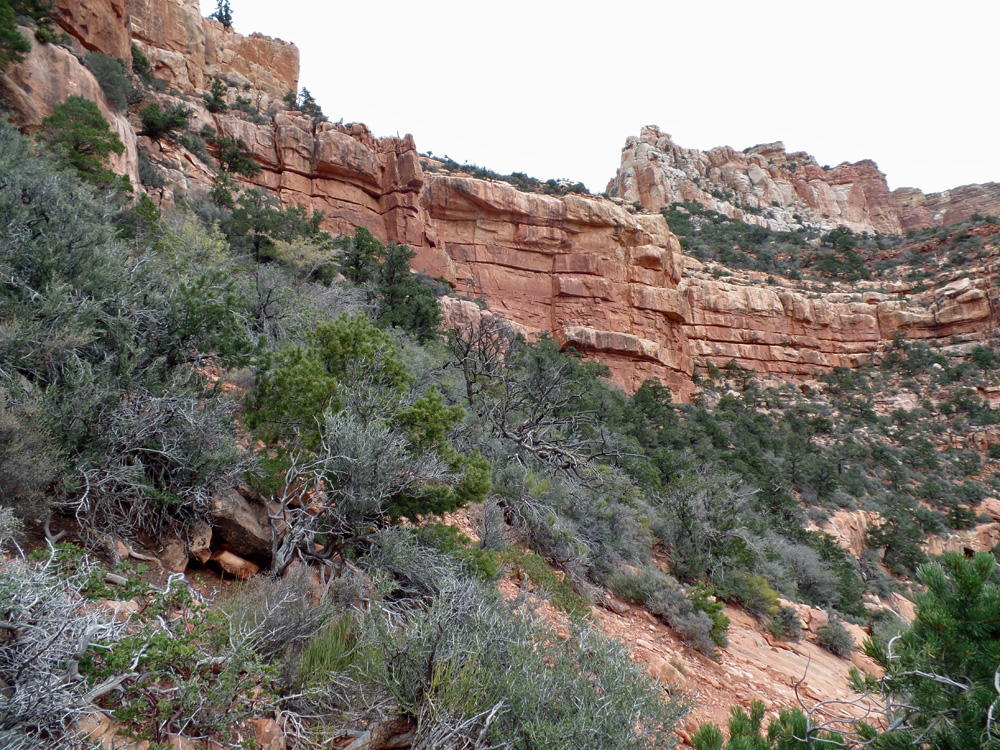 |
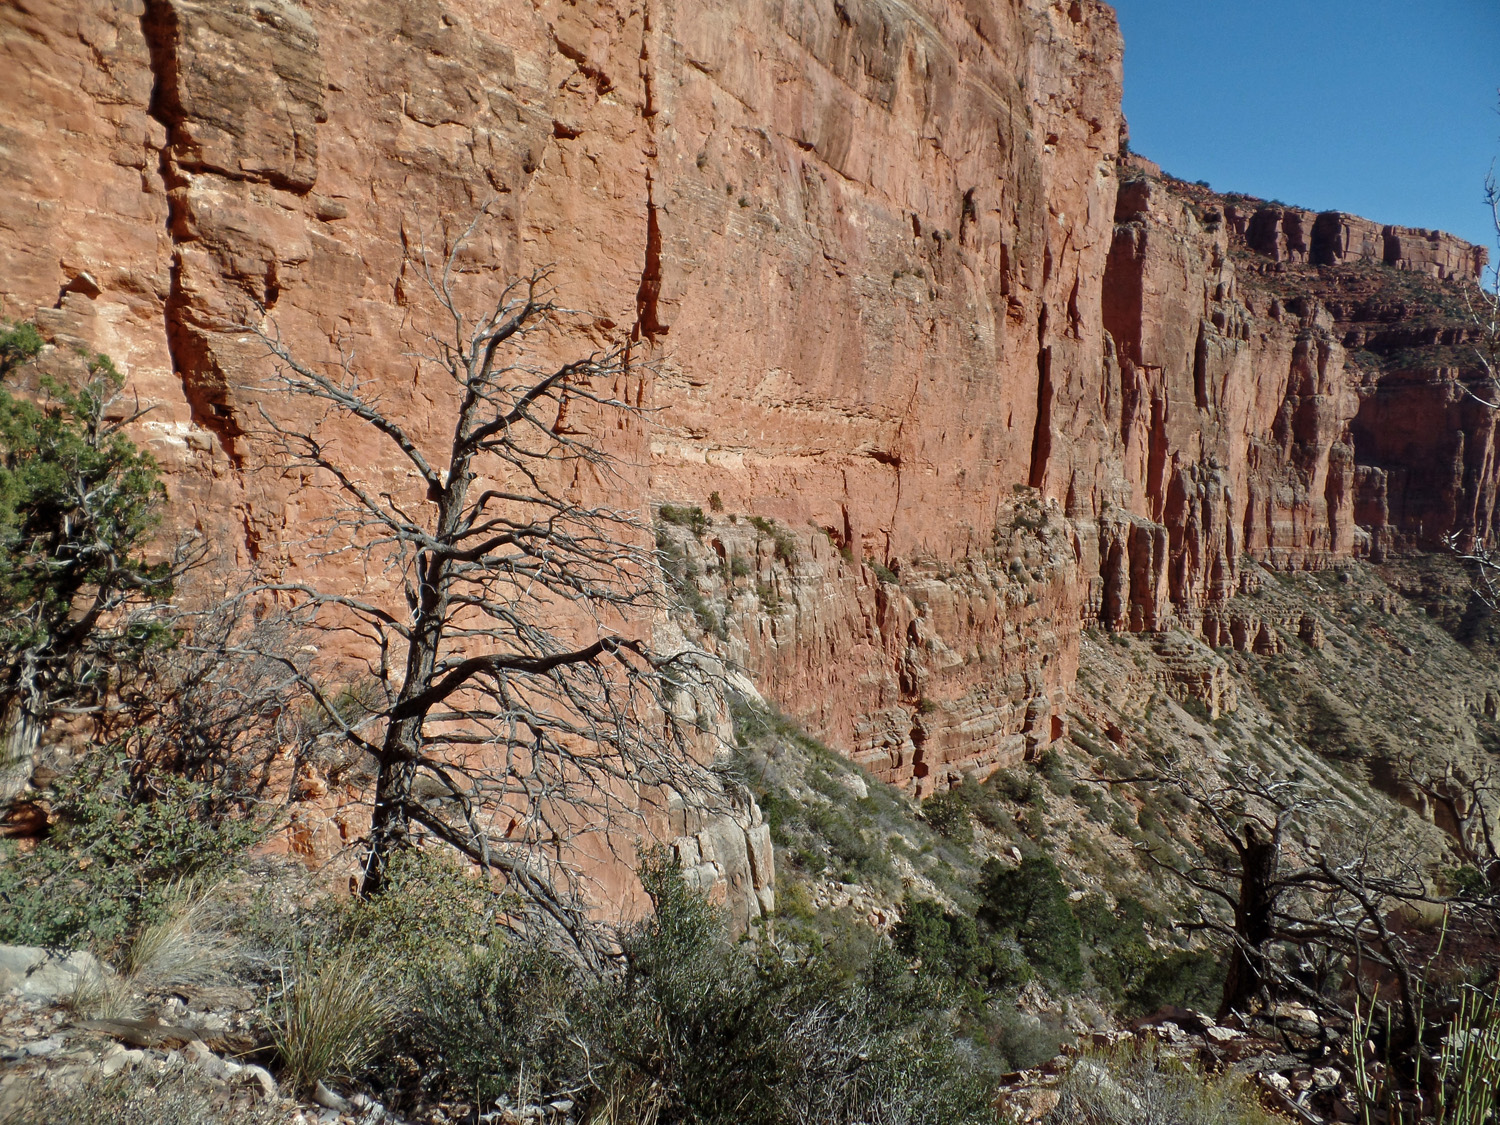
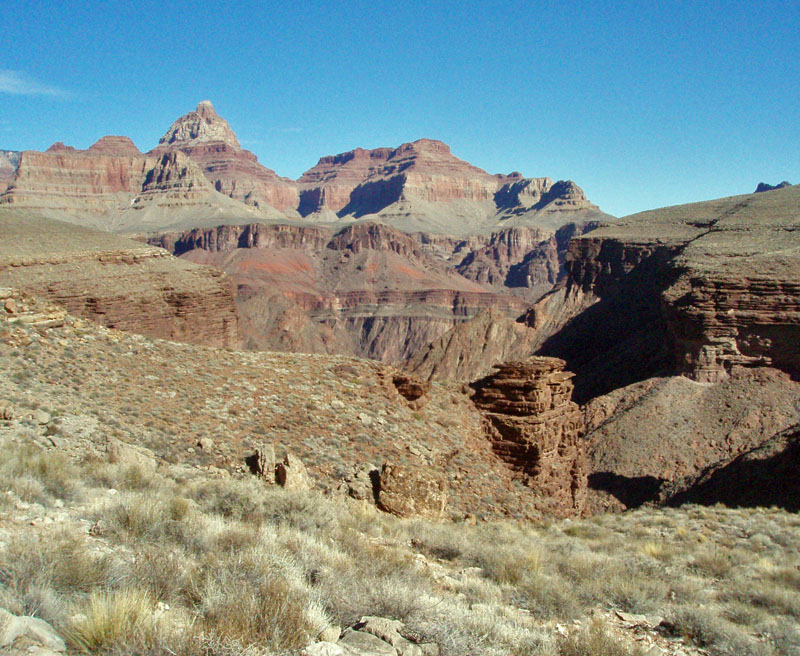
Looking back at the area contoured with Saddle Mountain looming above. |
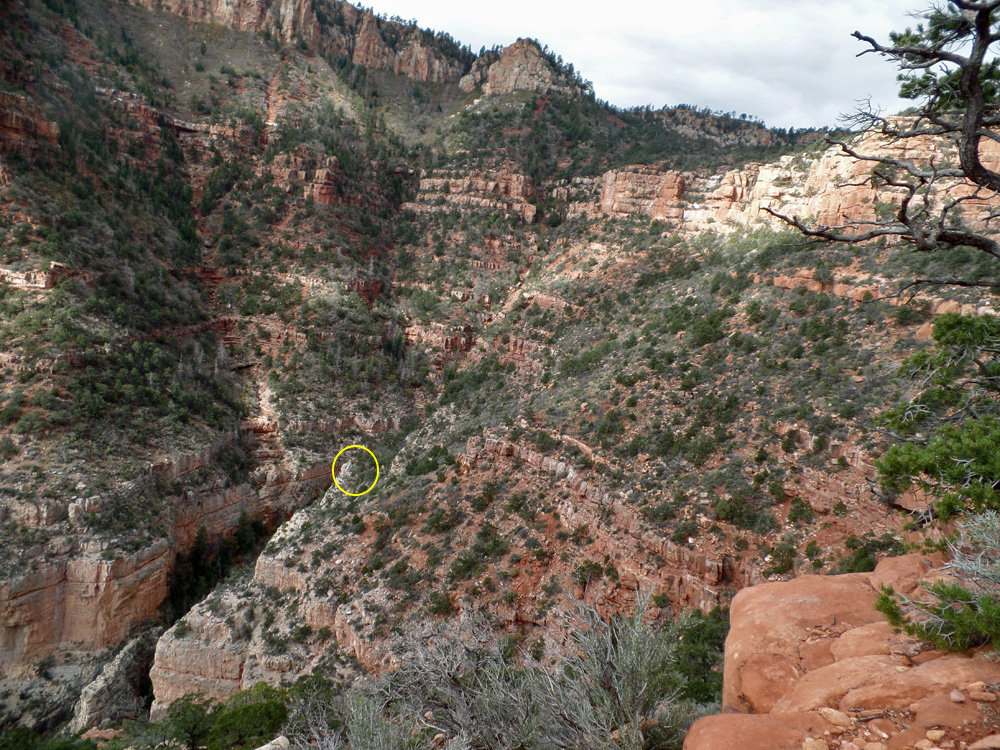 |
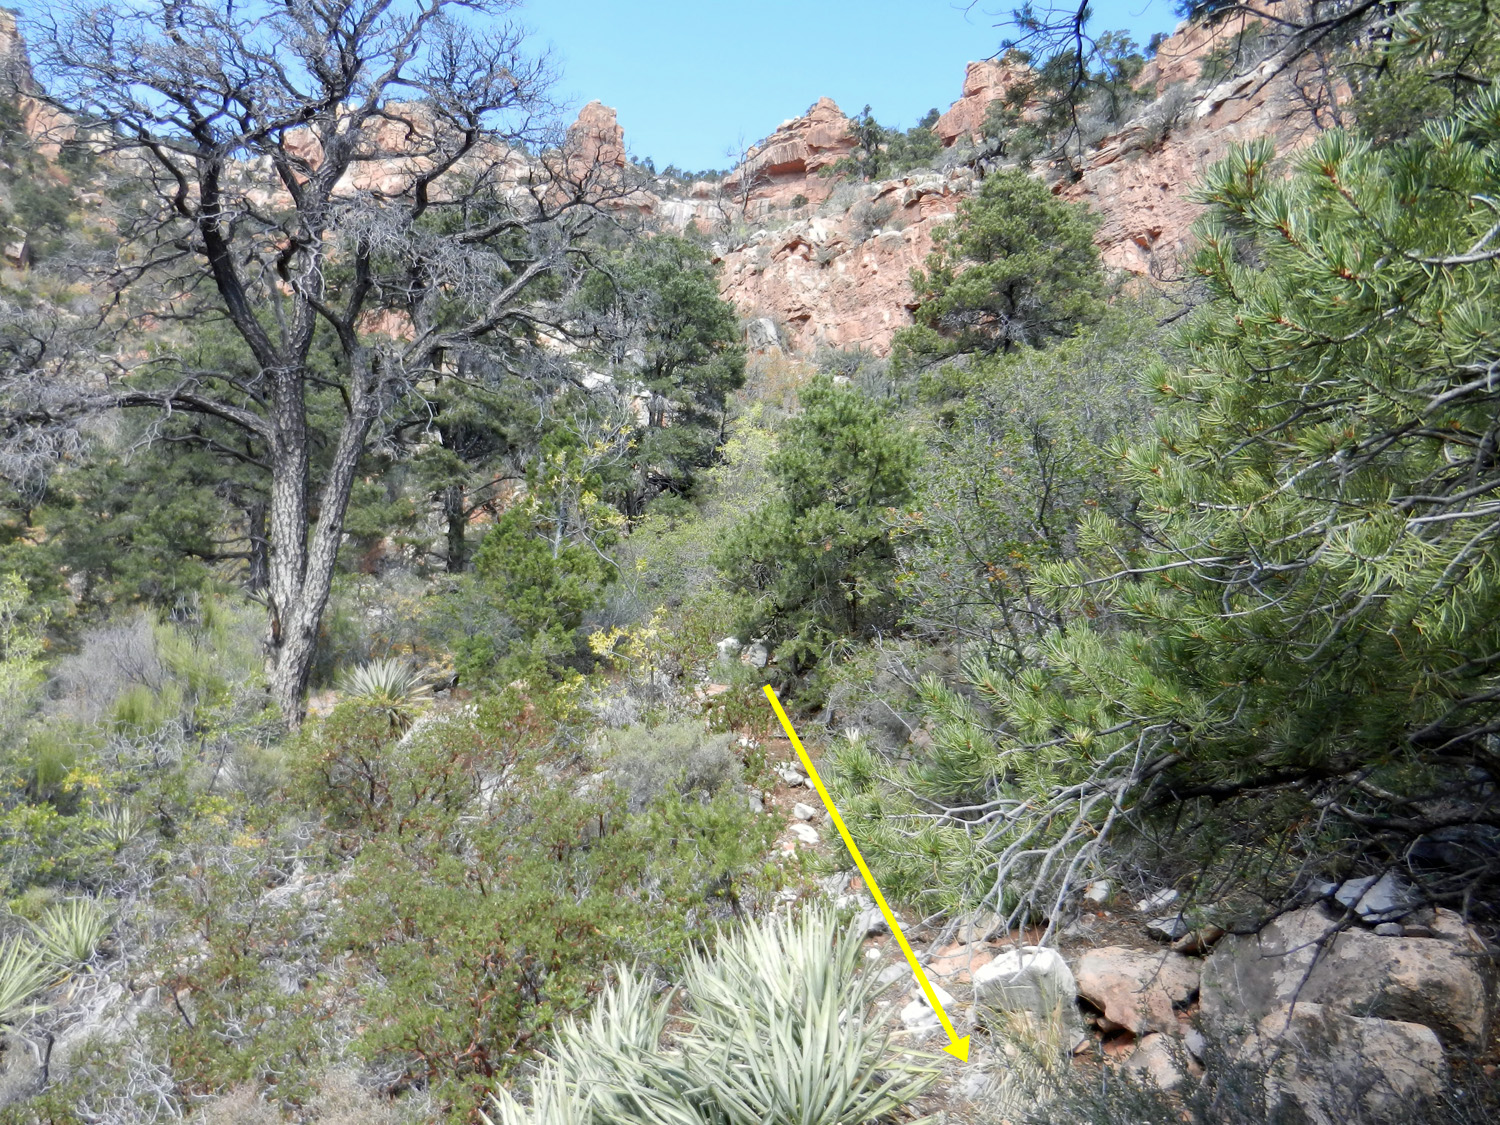
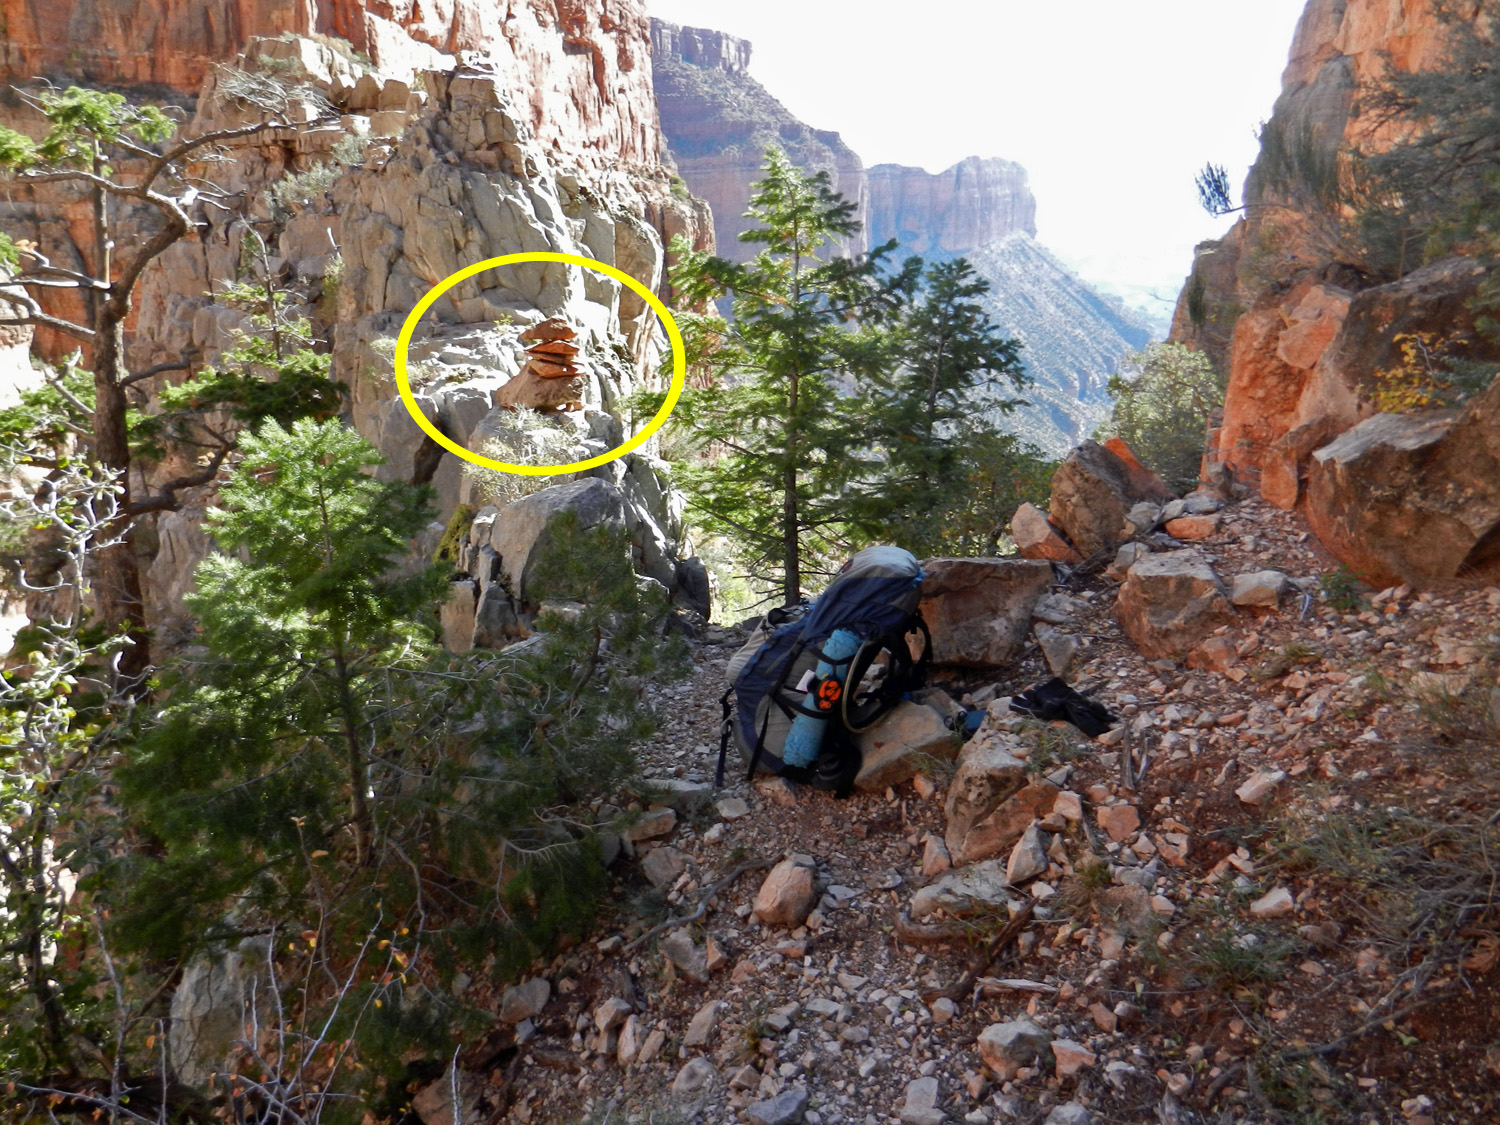
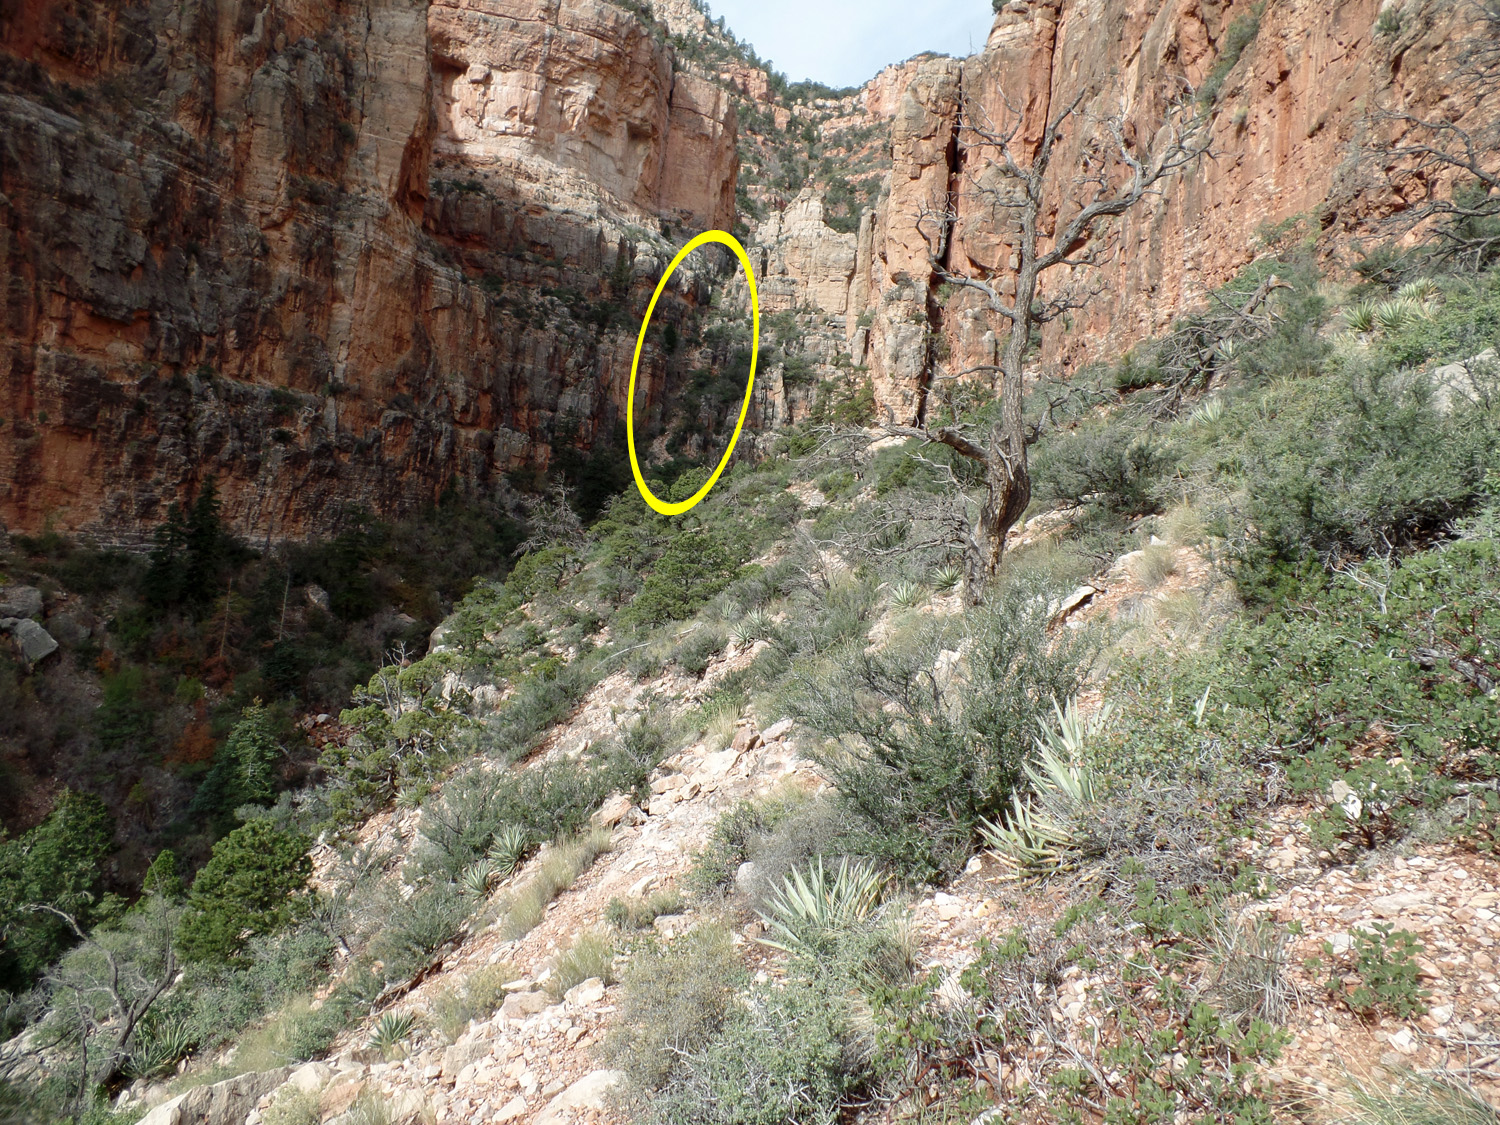
The target descent off the Redwall is shown by the yellow circle. The hanging forest can be seen below it to the left. |
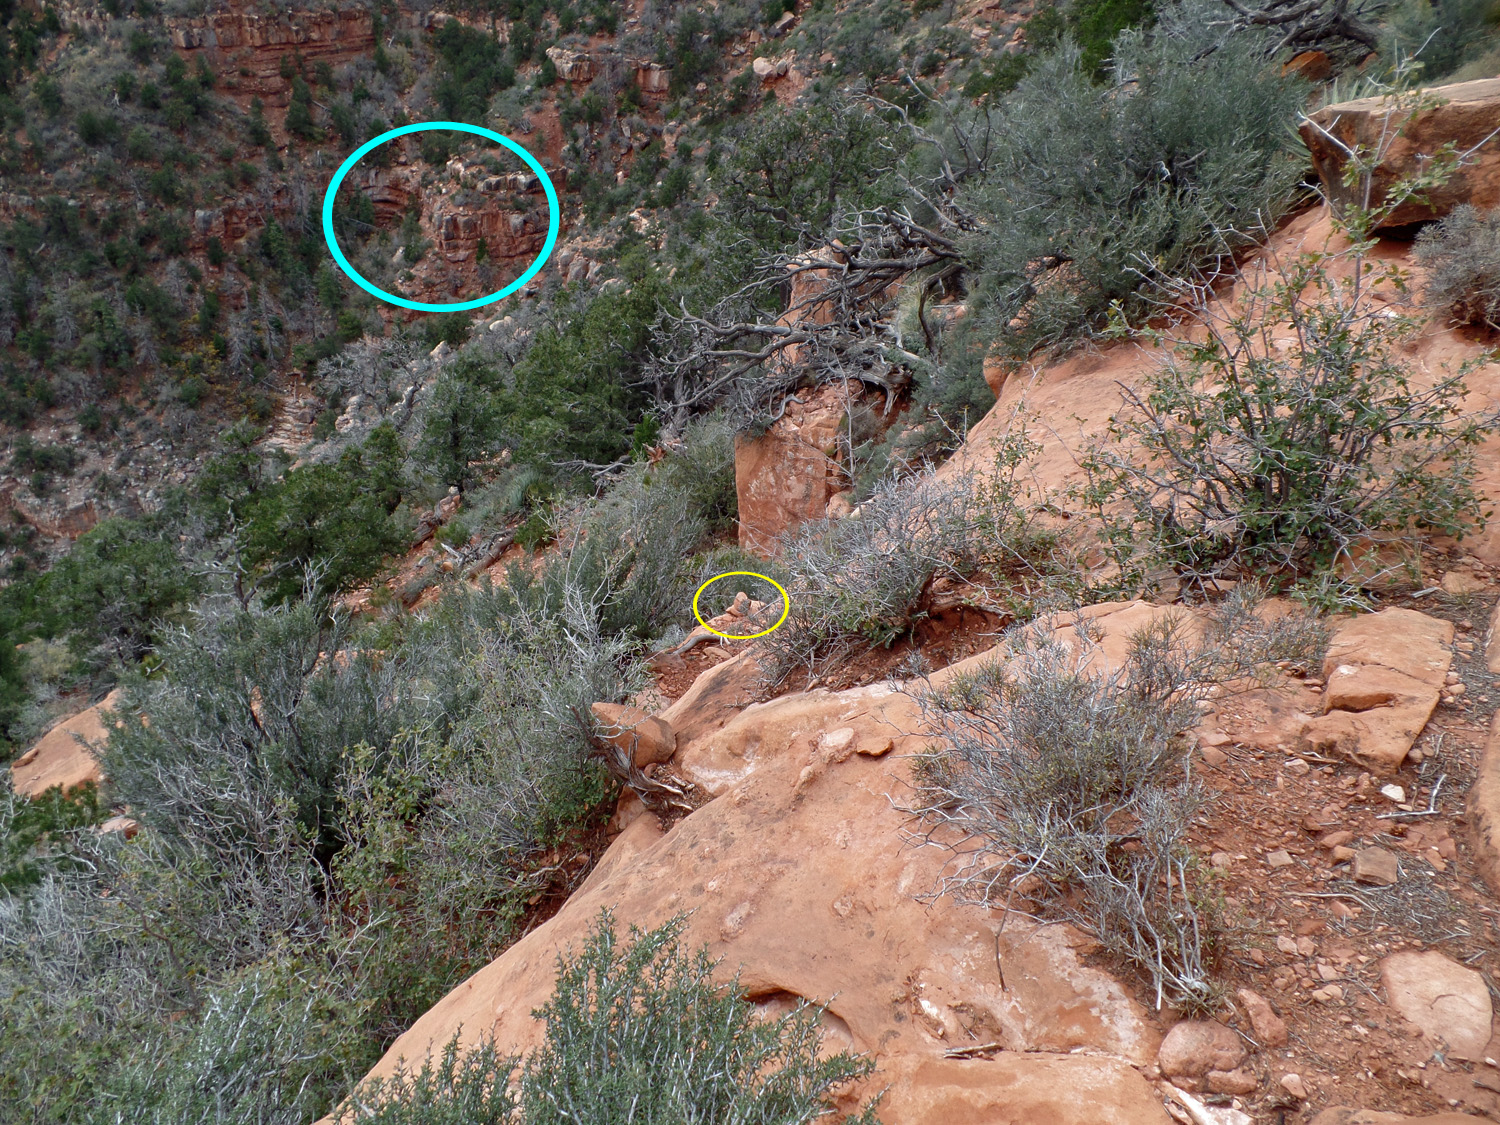 |
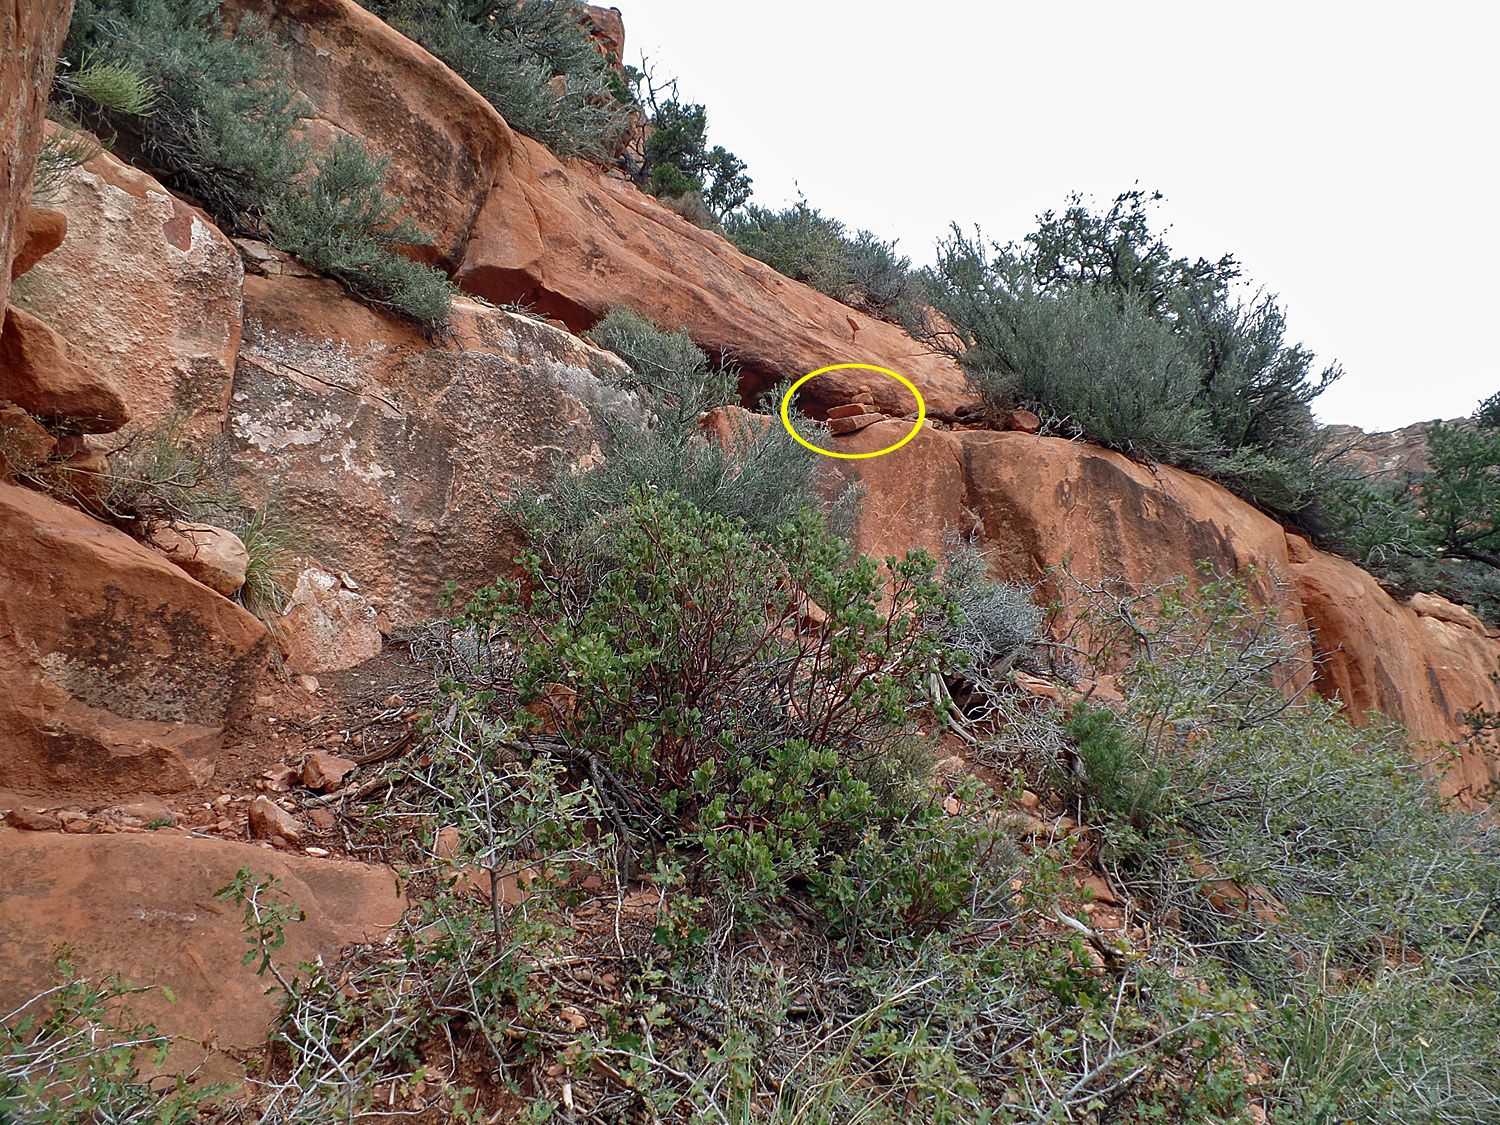
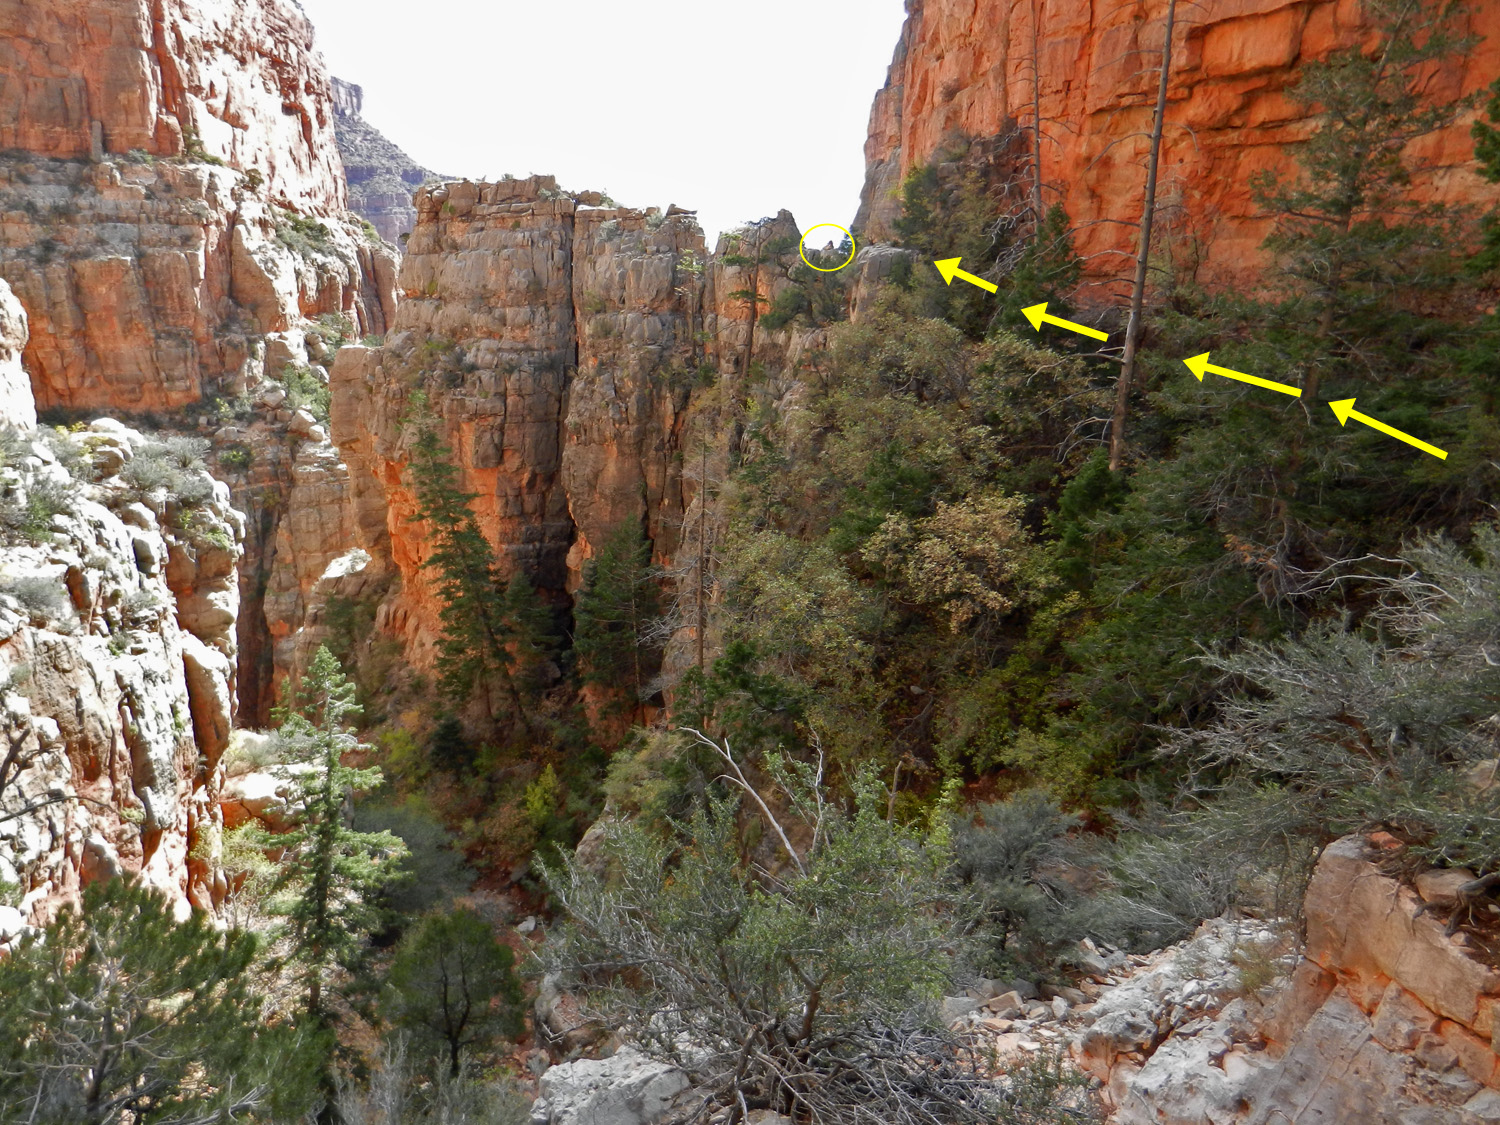
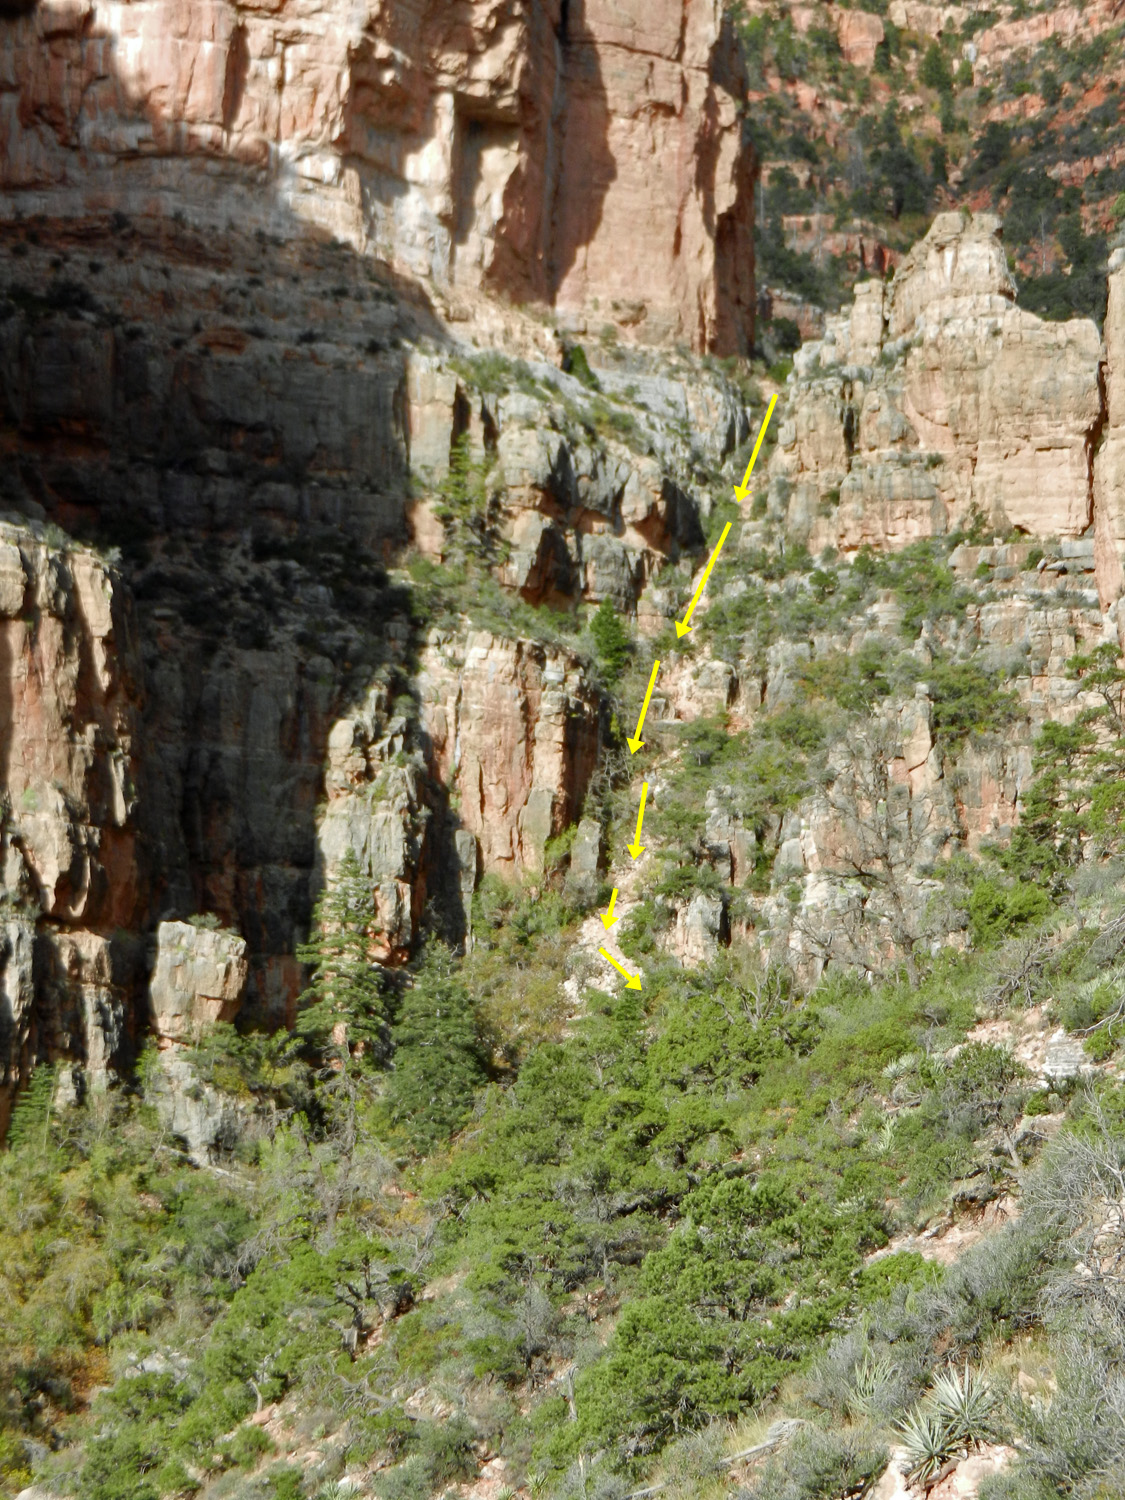
Is this the major cliff you have to bypass? I am thinking that the lowest one is just a walk through out here and that the upper one is not difficult if you find the right spot. Be that as it may, the only photos I have of any of the climbs here are only of this one spot. There is a cairn in the yellow circle to help guide one down at this spot (it is easier to see coming up!). The blue circle shows the same area circled on the earlier photo to give this some context. |
 |
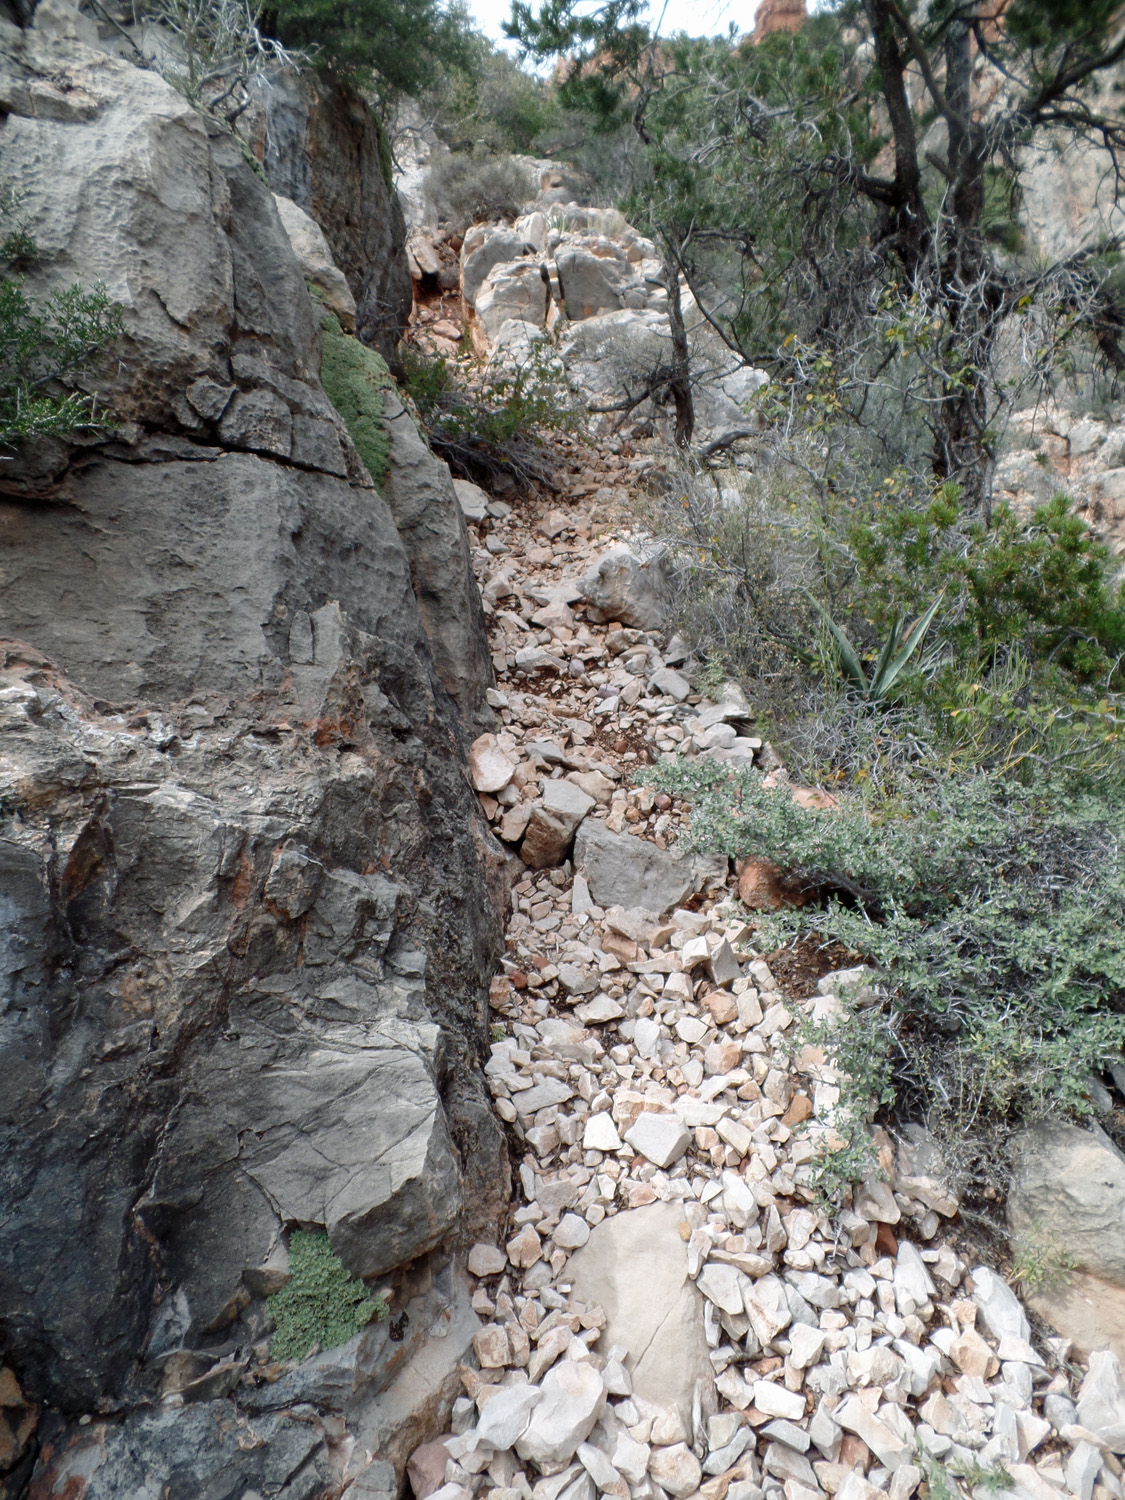
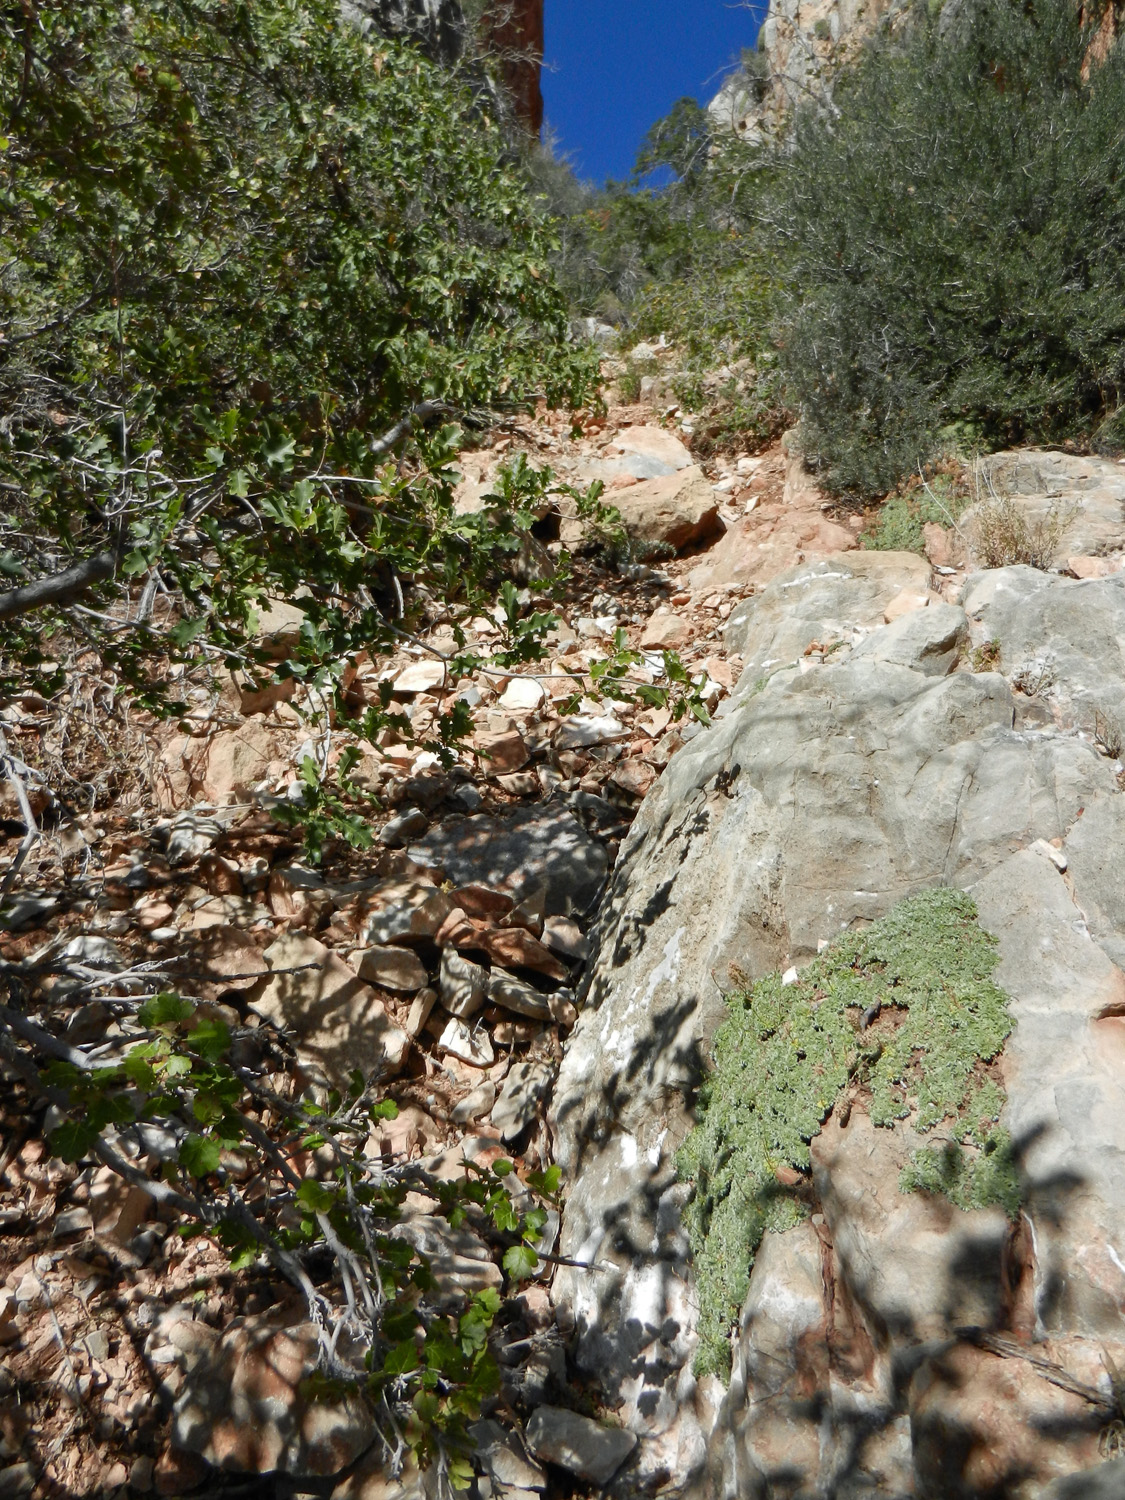
Getting down to the cairn and one can see that the route is through the bushes and dead snags to a steep slope through lower portion of this cliff. |
 |
Looking back up at the cairn. The route is just out of view to the left. |
 |
Once at the right spot atop the Redwall, the route heads out to a peninsula-like formation that sits between the two walls of the canyon. I have found a reasonably easy-to-follow trail through here until you get to the craggy limestone that you must descend to get to the hanging forest on the opposite side of the canyon. |
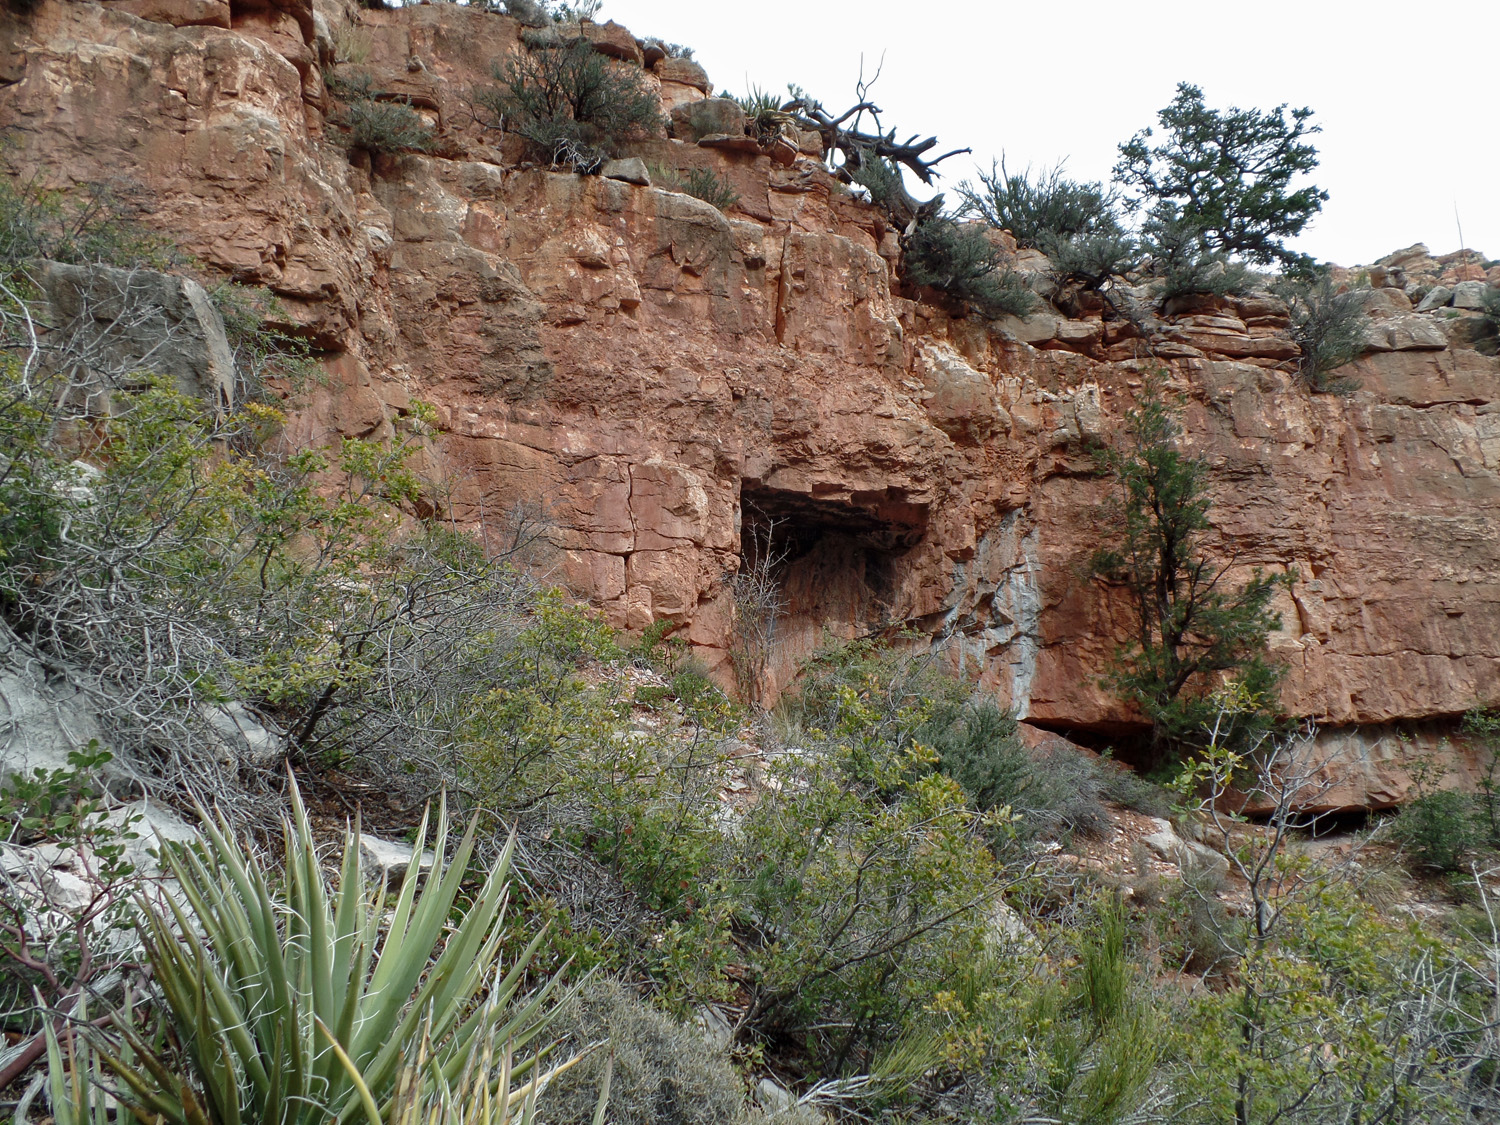 |
Looking back to the left, a notable overhang may catch your attention. |
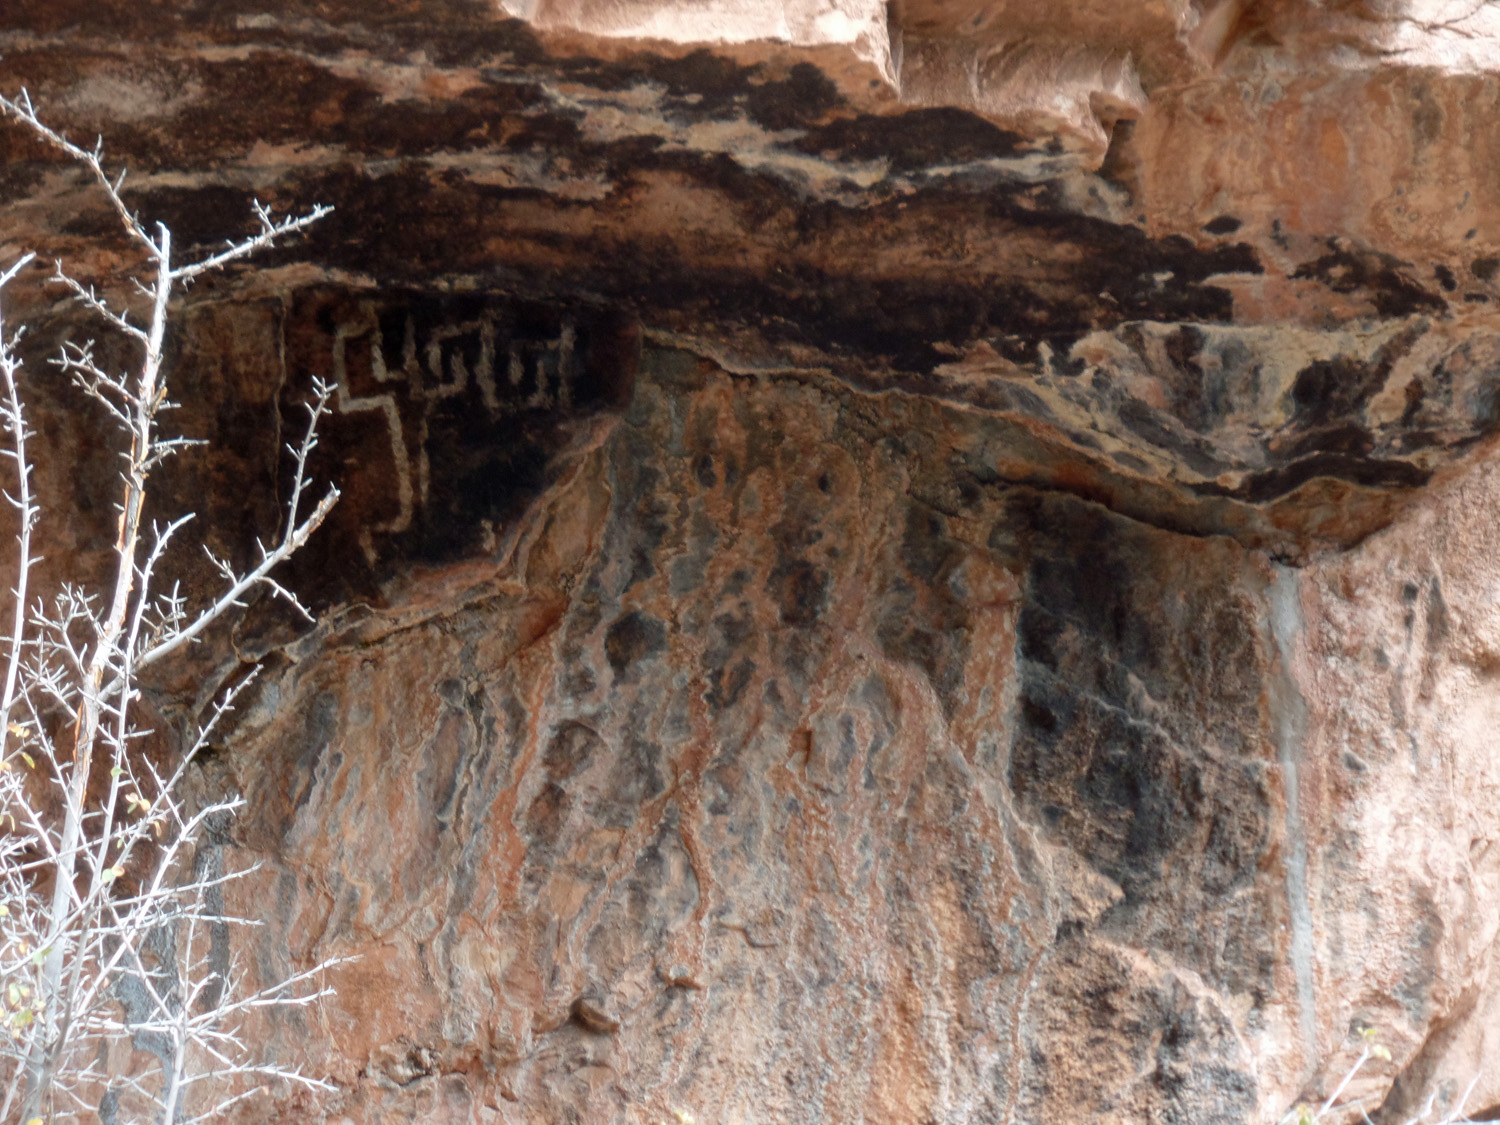 |
Under the overhang are some pictographs and this one was the most intriguing to me. |
 |
Clear path for a short while as you get separated from the north side of the canyon. |
 |
Continued easy going as long as the slope is gentle and covered in grasses and bushes. |
 |
Looking over at the south side of the canyon and the hanging forest. |
 |
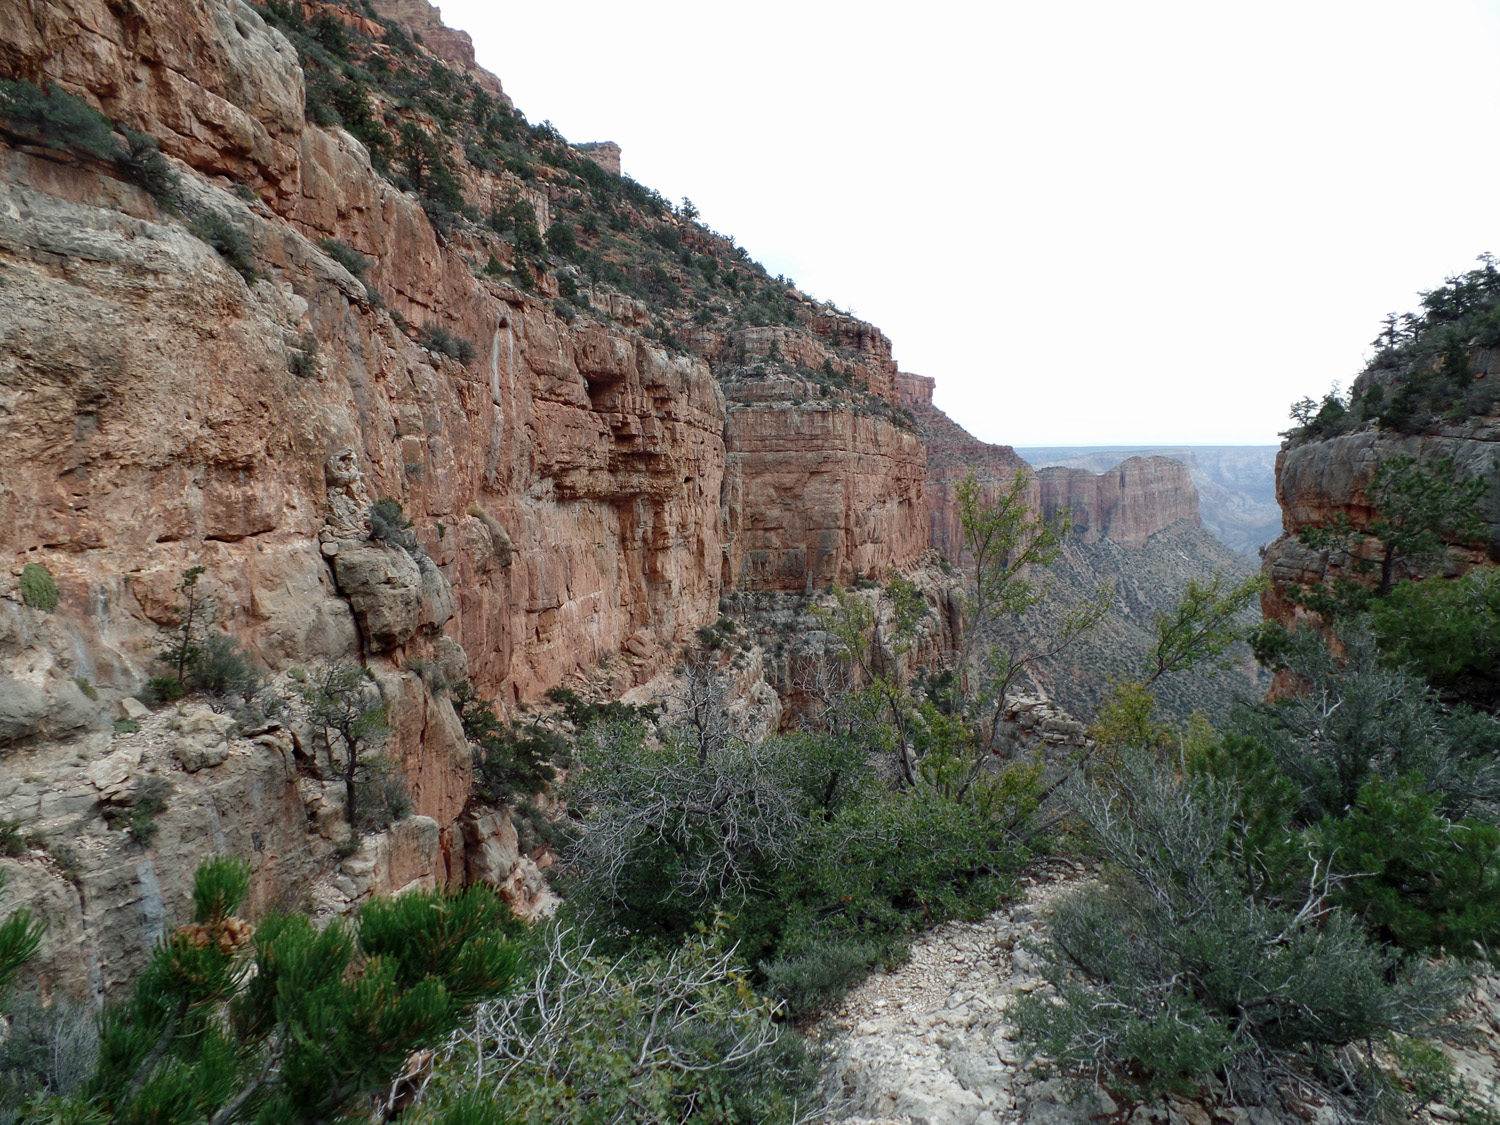
As you continue out to the end of the peninsula, you will see the fin that marks the top of the steep Redwall descent, just past the hanging forest. |
 |
And, closer to the end of this point. The route I've followed was to the left here (north side), sometimes along a residual path and sometime climbing through the rocky outcrop. |
 |
Steep path over the point. |
 |
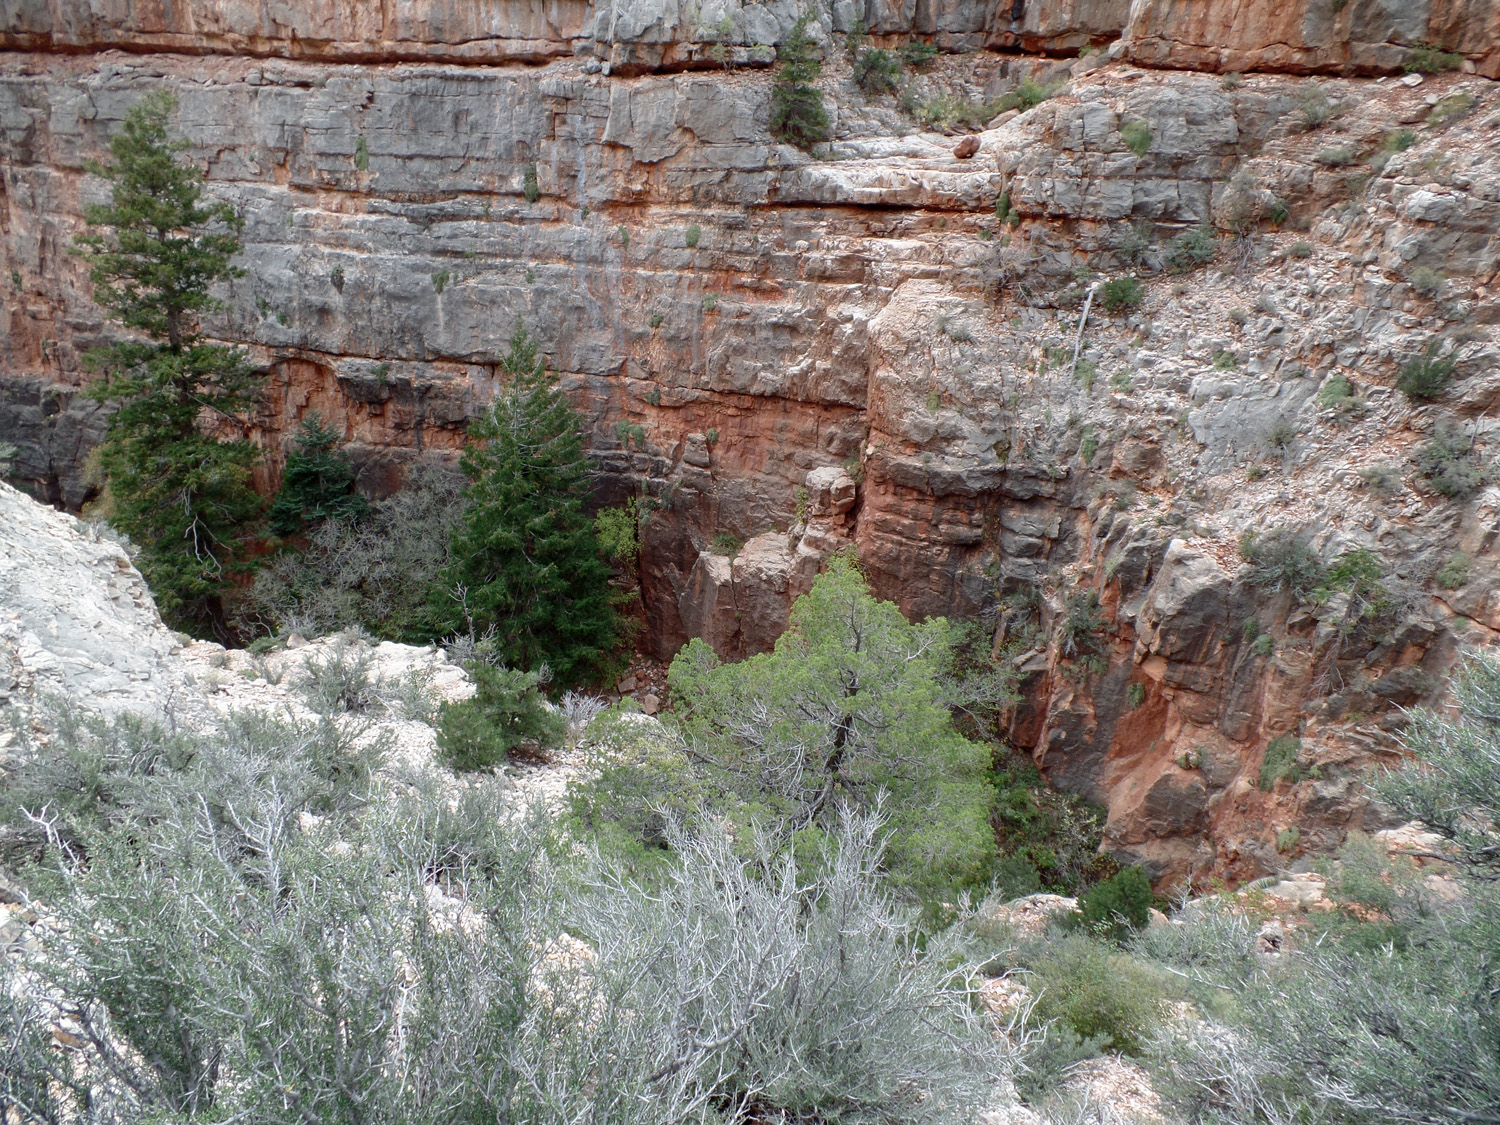
As you get lower you can see where you need to go - the route follows along the base of the cliff behind the hanging forest out to a small saddle (cairn is circled) that marks the descent. |
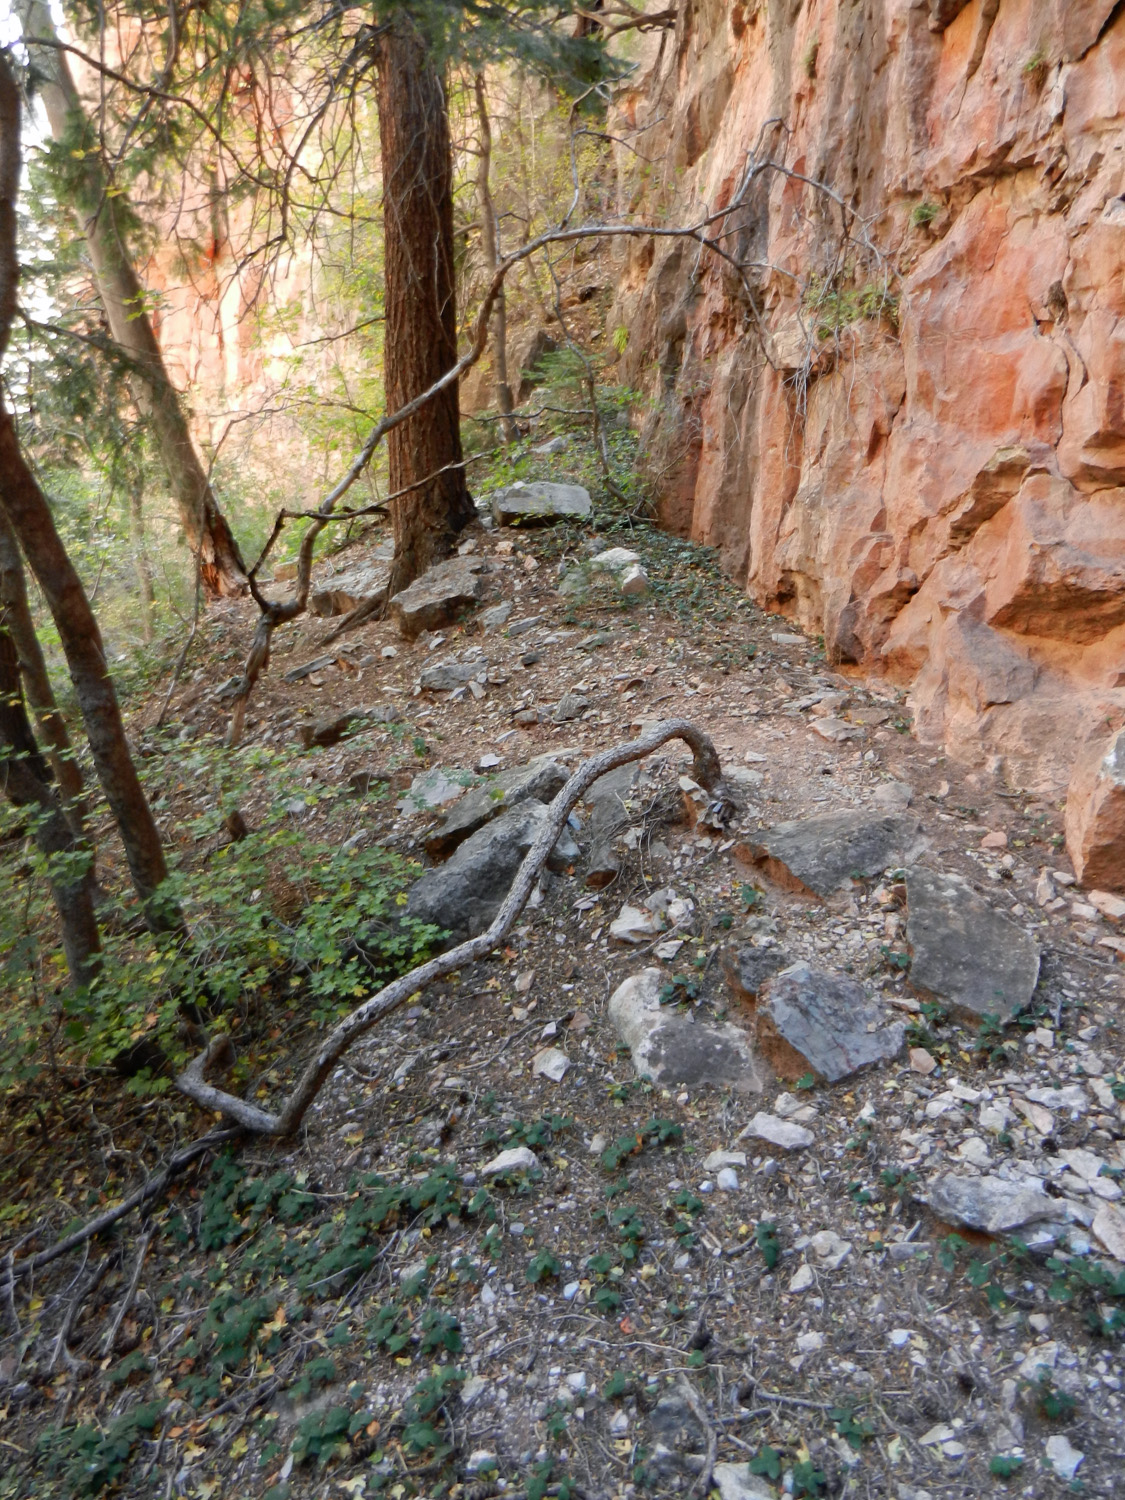 |
The route between the cliff and the trees. |
 |
Out at the saddle with the cairn. |
|
|
|
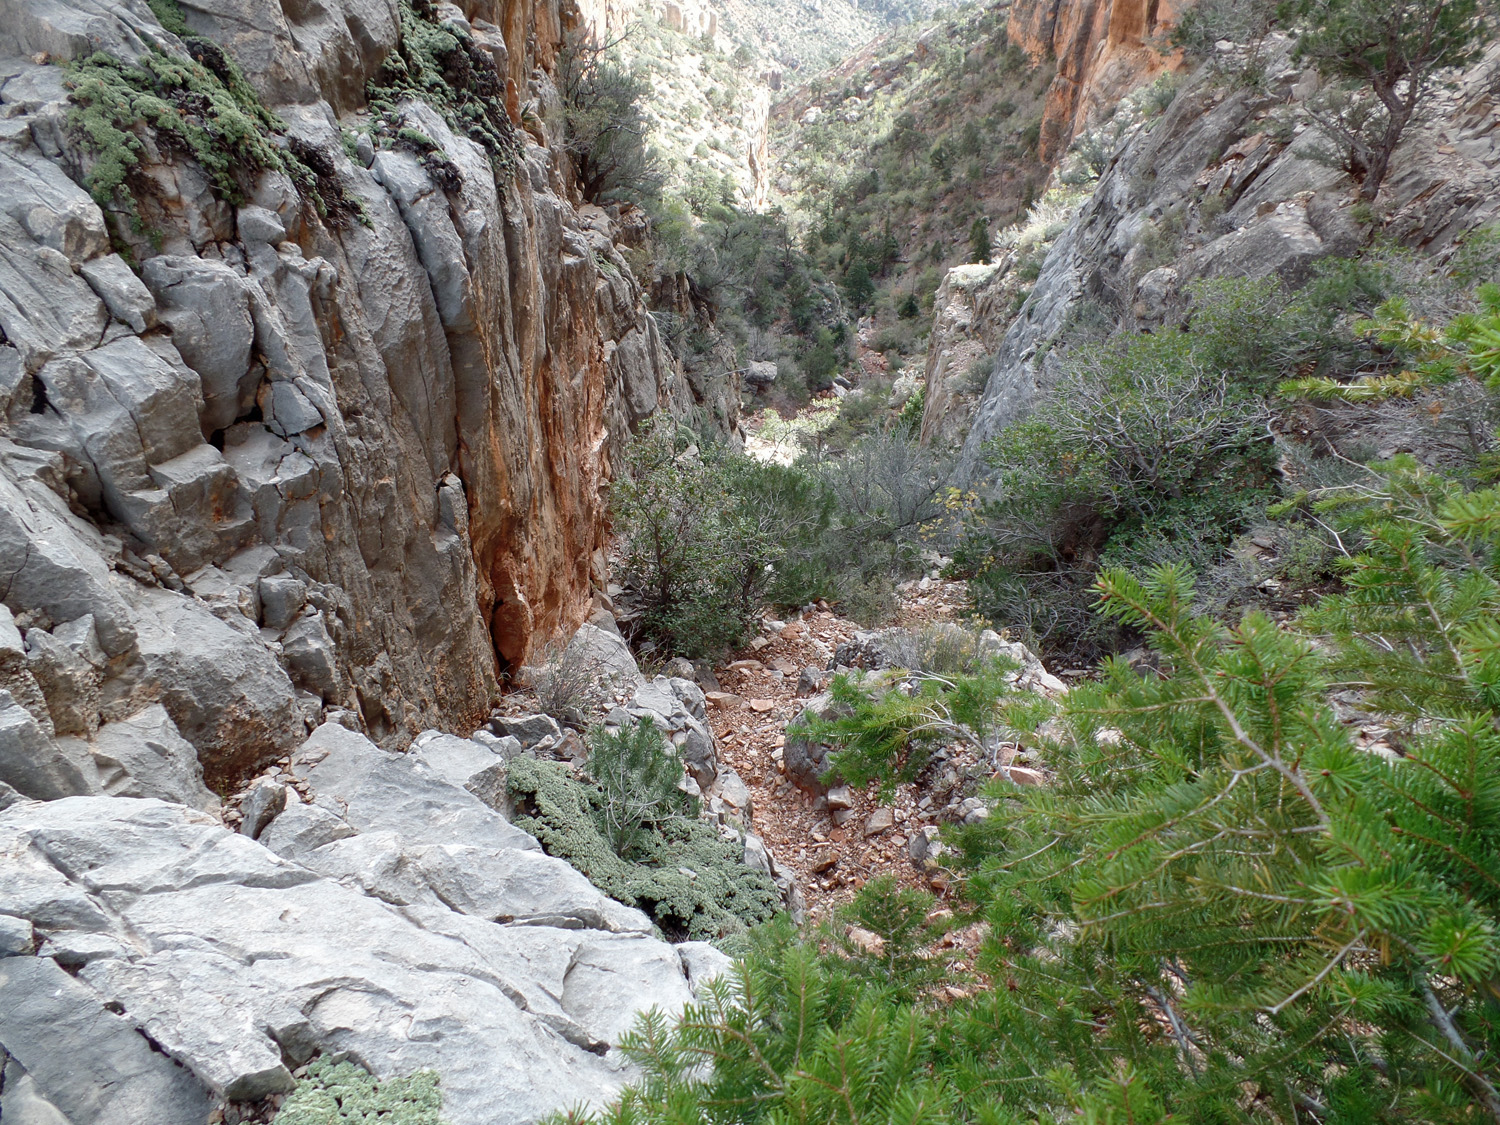 |
Looking down the descent. I've only come up this route following very loose but short switchbacks all the way up. |
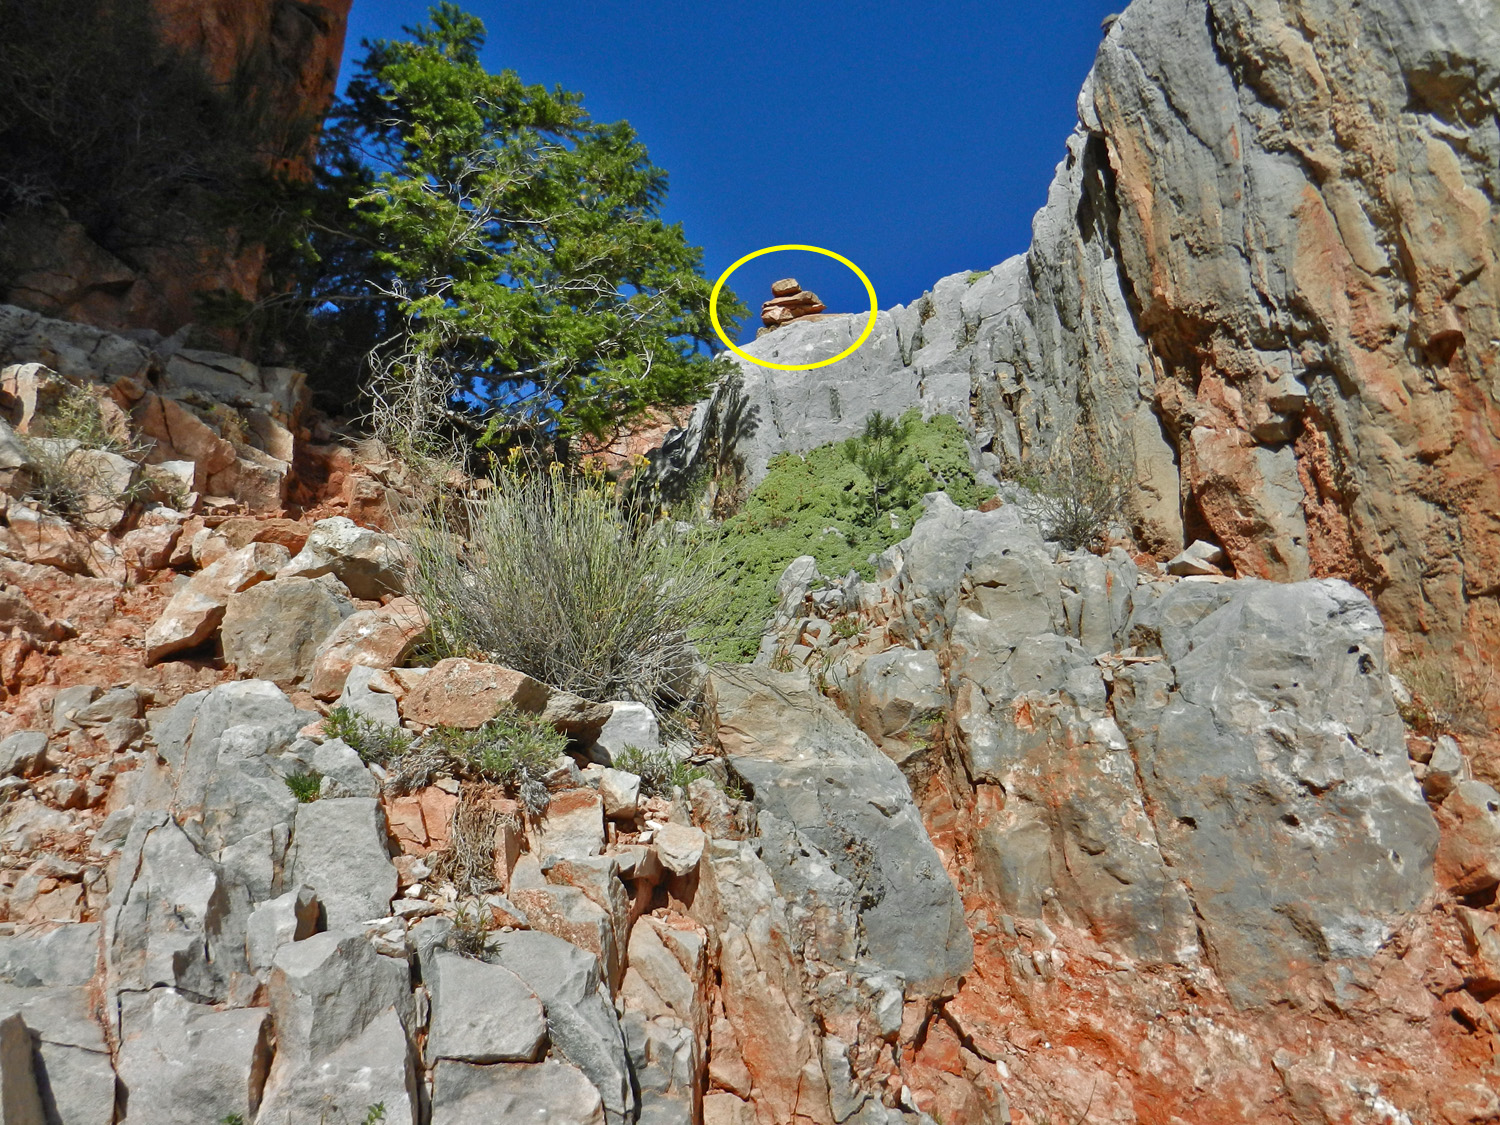 |
The cairn is visible from near the top of the route. |
 |
Looking up a typical section of the route through the Redwall. |
 |
At the bottom of the descent you are in the main bed. You cross over and find a good path on the other side that will take you on a contour of a wide bench for a short distance. |
 |
Looking back you can see the route coming down the Redwall. |
 |
Another view of the route down the Redwall from along the bench. |
 |
The view as you near the end of the contour along the bench. Here you will have to scramble down off this bench. It seems best to continue on this direction until you get to a rocky ravine marked with occasional cairns leading you back to the bed of the canyon. |
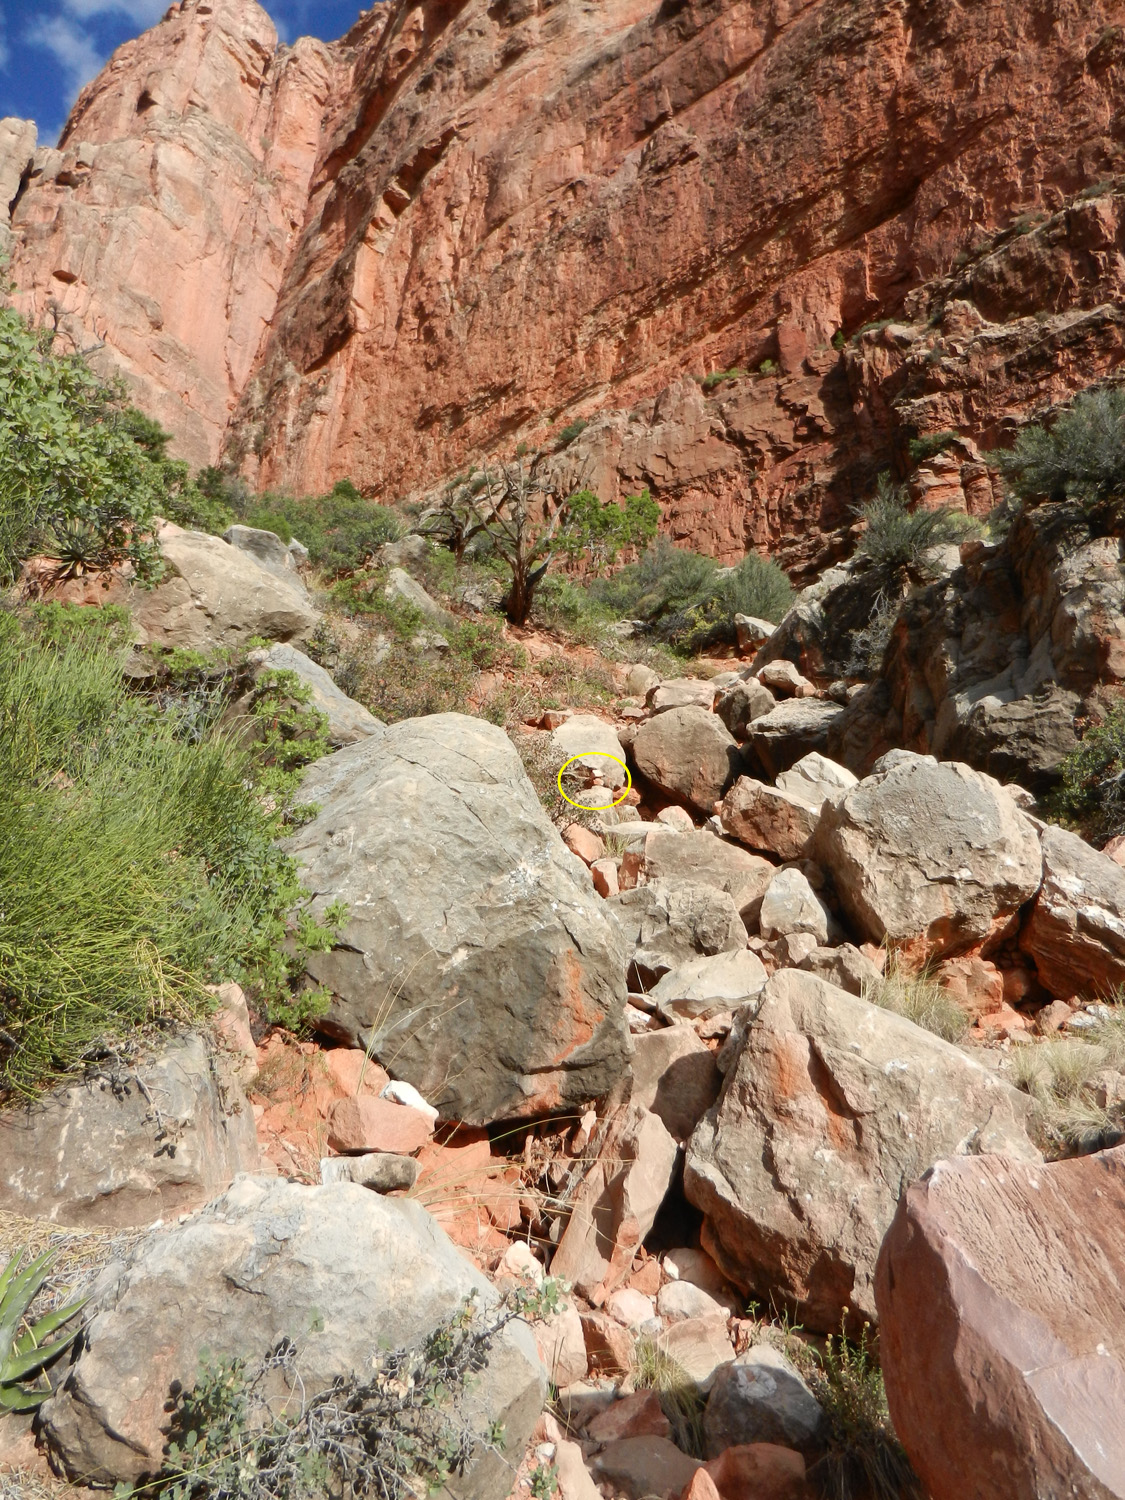 |
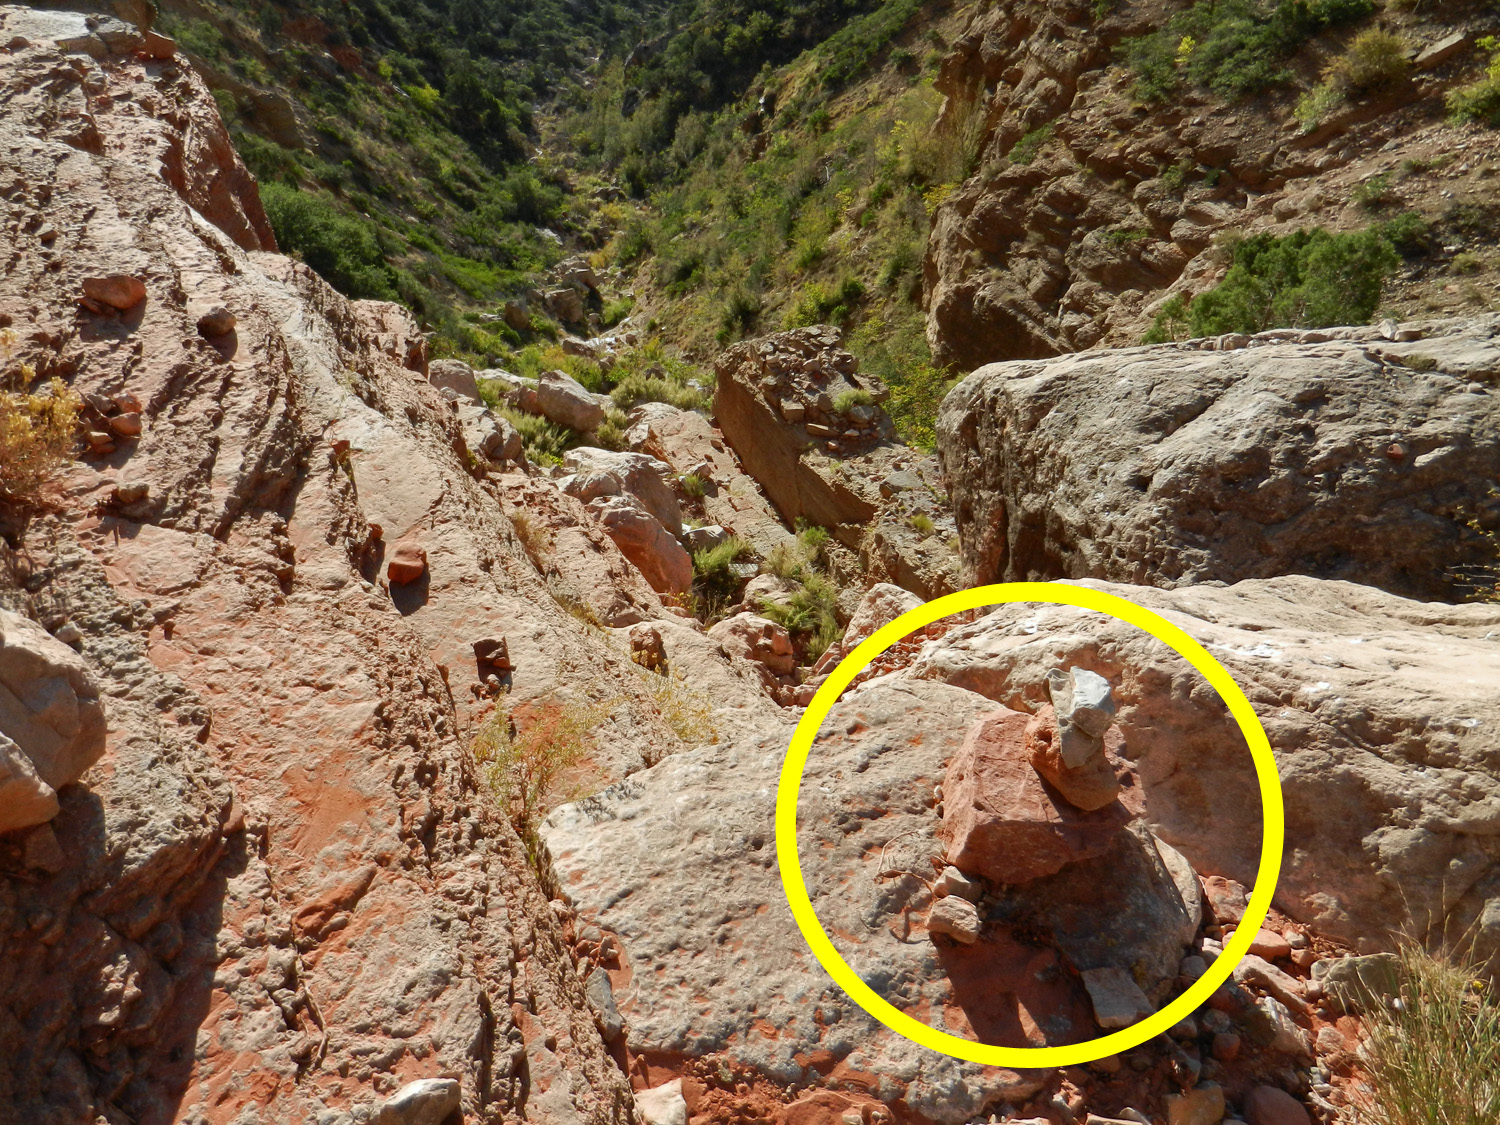
Rocky ravine with small cairn circled. |
 |
Once in the bed you make your way down to the Muav steps, marked by this cairn. There are minor obstacles along the way. Here you gingerly step down and cross over to the right hand side of the big flat cliff below. You're now home free, but it will still take 90 minutes (give or take) to reach the junction with the wet arm that comes from Mystic Falls. At this junction, there is a nice camping area up on the terrace between the two arms. |
| Coming down this route seems quite difficult to me. But, if your objective is to visit Mystic Falls, it certainly would get my consideration. Or, if you want to head to Kolb Natural Arch. If you're headed for the river, or over to Kwagunt on the Butte Fault, I would think that the regular trail is better and faster. |
|
|
||
|
|
Return to Hiking Grand Canyon home page |
|
